“Ultimate Guide”
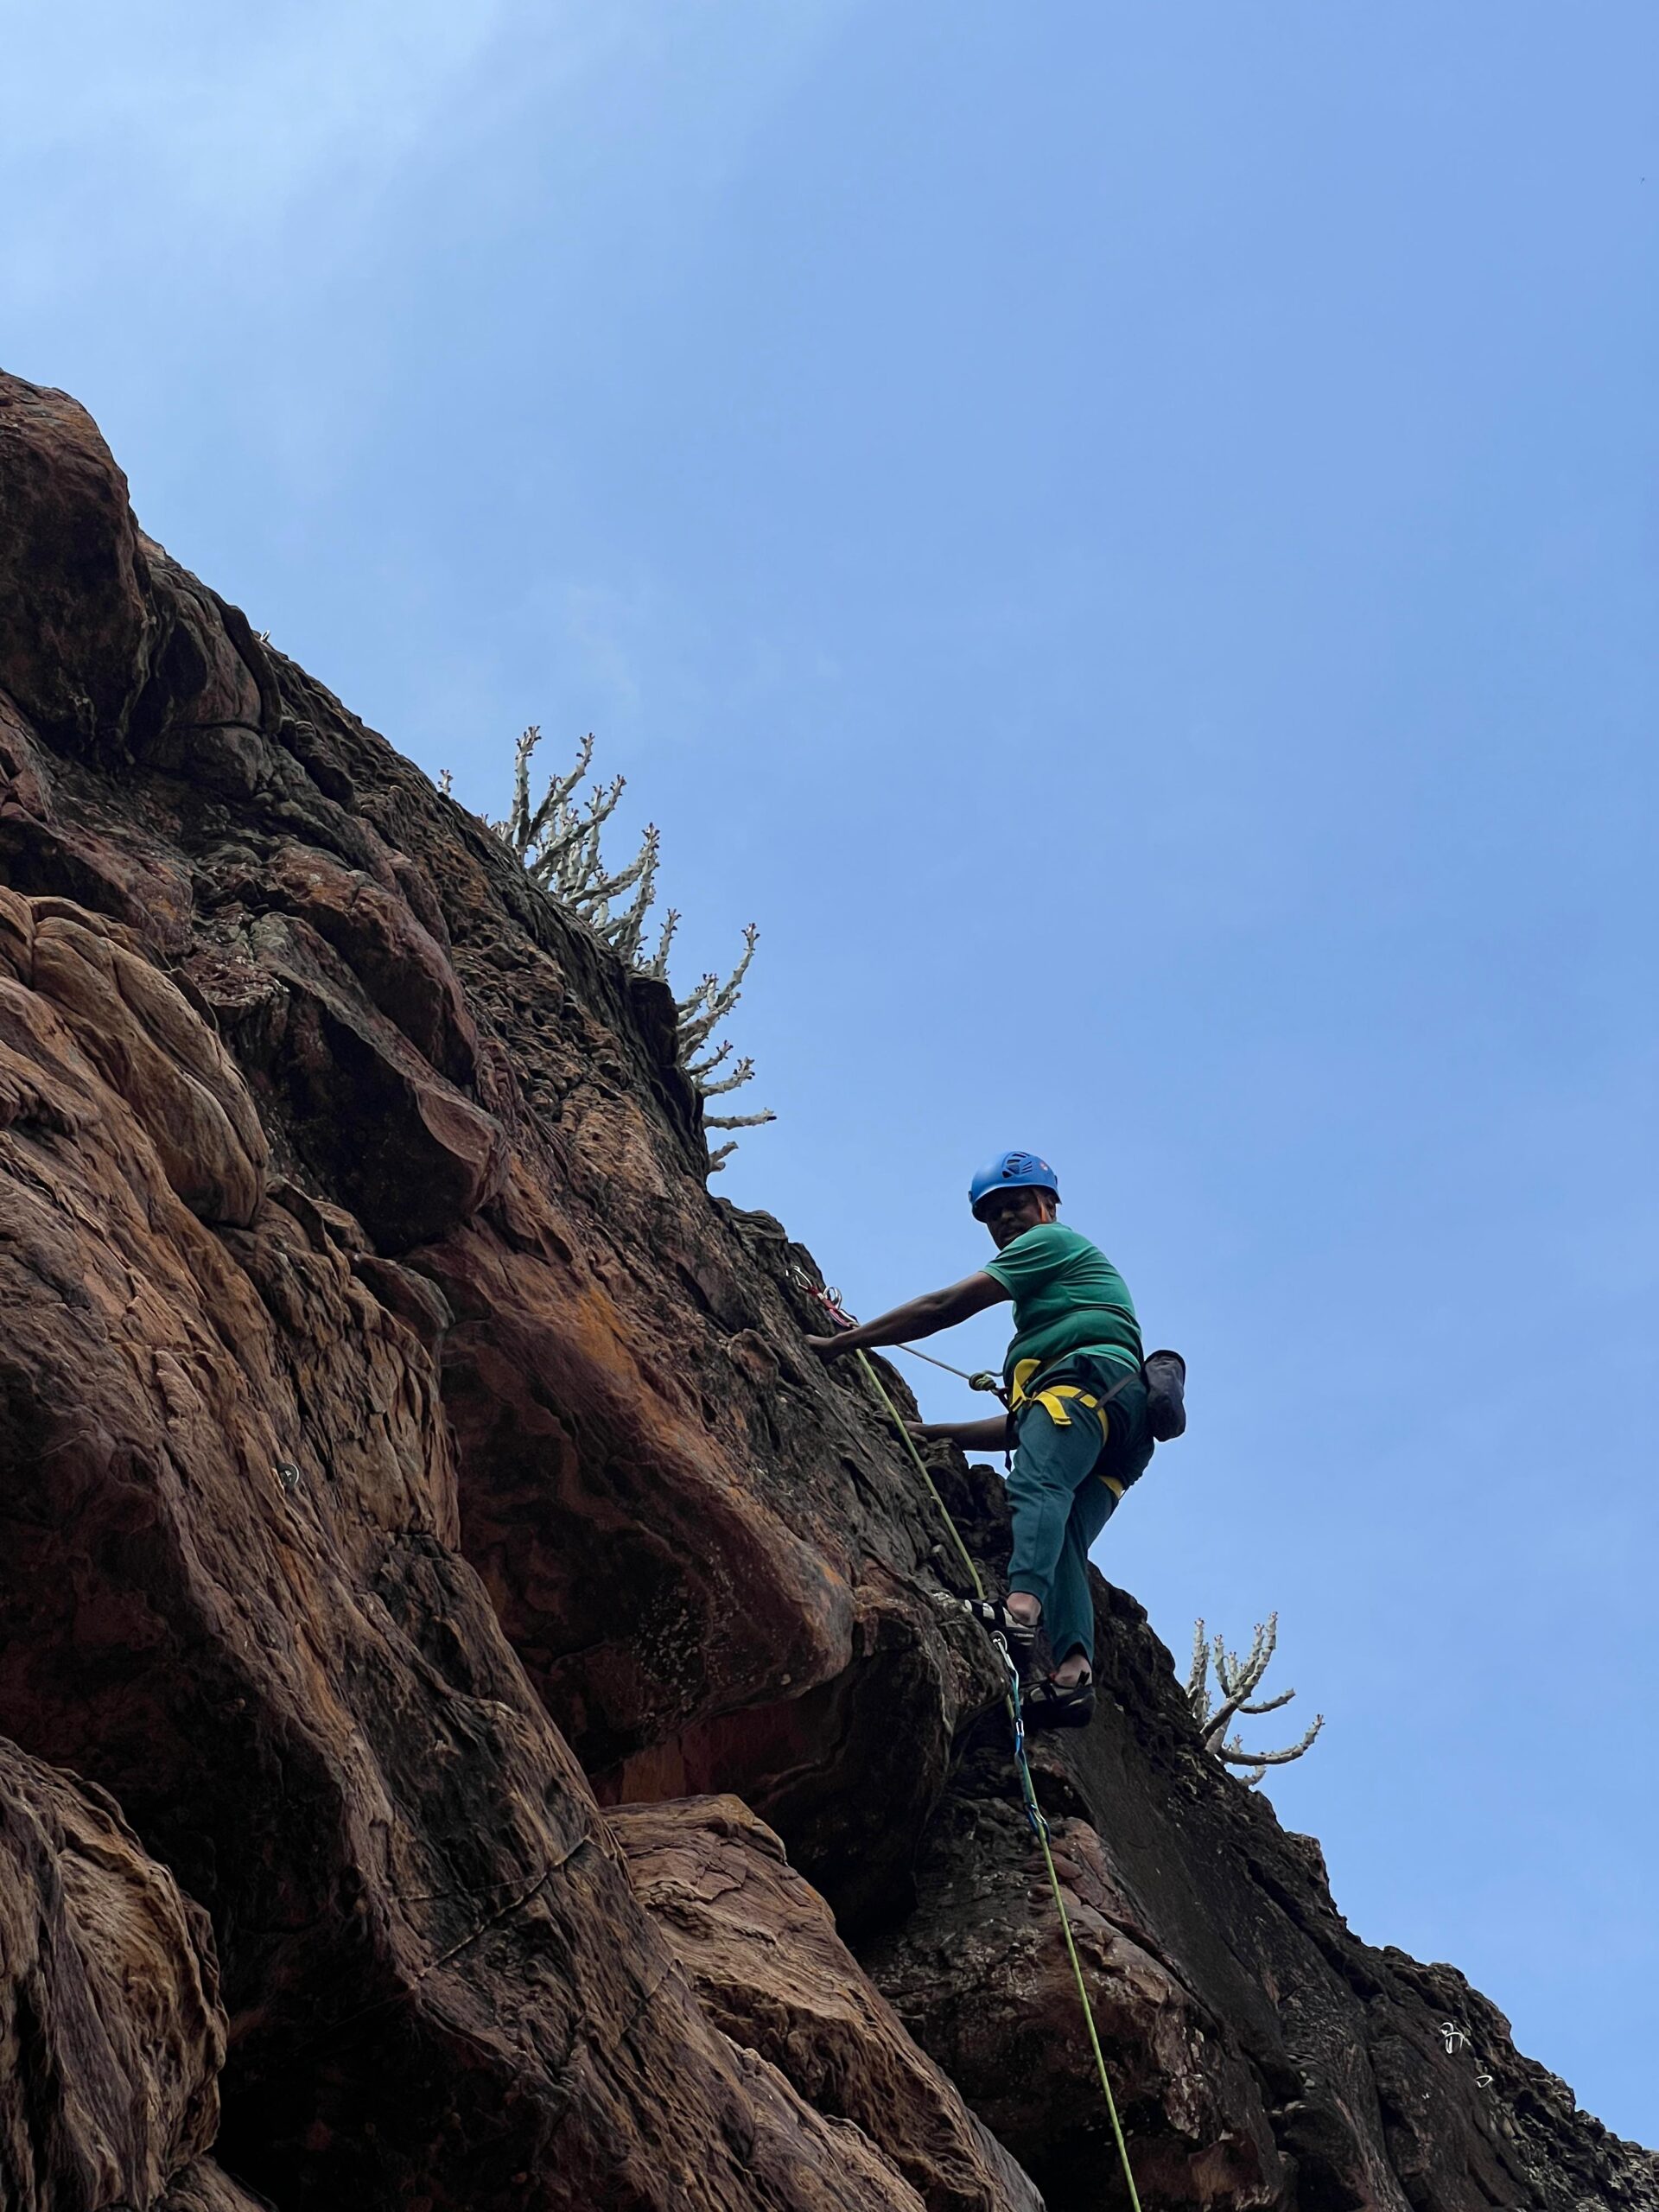
The Ultimate Rock Climbing Equipment List: Essential Gear for Every Climber
When discussing “soft gear” in rock climbing, this refers to equipment made from textiles, ropes, or fabric, as opposed to “hard gear” like metal protection devices and hardware. Soft gear is essential for safety, climbing technique, and efficiency. Here’s a list of the key soft gear used in rock climbing:
Rock climbing equipment soft gares
1. Climbing Rope
- Types:
- Dynamic Rope: Primarily used for lead climbing. It stretches to absorb the shock of a fall.
- Static Rope: Used for rappelling, hauling, and ascending, with minimal stretch.
- Choosing the Right Rope for Climbing
- Selecting the right climbing rope is crucial for safety and performance. Here’s a breakdown of key factors to consider:
- Rope Type:
- Single Ropes: Ideal for sport climbing, traditional climbing, and indoor gyms.
- Half Ropes: Used in pairs for long or wandering routes where rope drag is an issue.
- Twin Ropes: Designed for ice climbing and alpine routes where redundancy is critical.
- Static Ropes: Primarily for rappelling, hauling gear, or rescue operations—not for dynamic climbing.
- Diameter and Length:
- Diameter: Thinner ropes are lighter and suitable for sport climbing but wear out faster. Thicker ropes are more durable and handle repeated falls better.
- Length: Choose a length based on your climbing location. Standard lengths (60m or 70m) cover most climbing needs, but longer ropes are ideal for extended pitches.
- Rope Features:
- Dry Treatment: Protects ropes from water, making them essential for ice climbing or wet environments.
- Middle Marks: Aids in rappelling and ensuring equal rope usage during climbing.
- Safety Ratings:
- Evaluate UIAA ratings for fall counts, impact force, and elongation. These indicate how well a rope performs under stress, helping you match the rope to your climbing style.
- Final Reminder
- Climbing safety is a personal responsibility. For beginners, expert instruction is essential to develop safe techniques and proper rope handling skills. Always invest in quality gear and prioritize training to ensure safe and enjoyable climbing adventures.

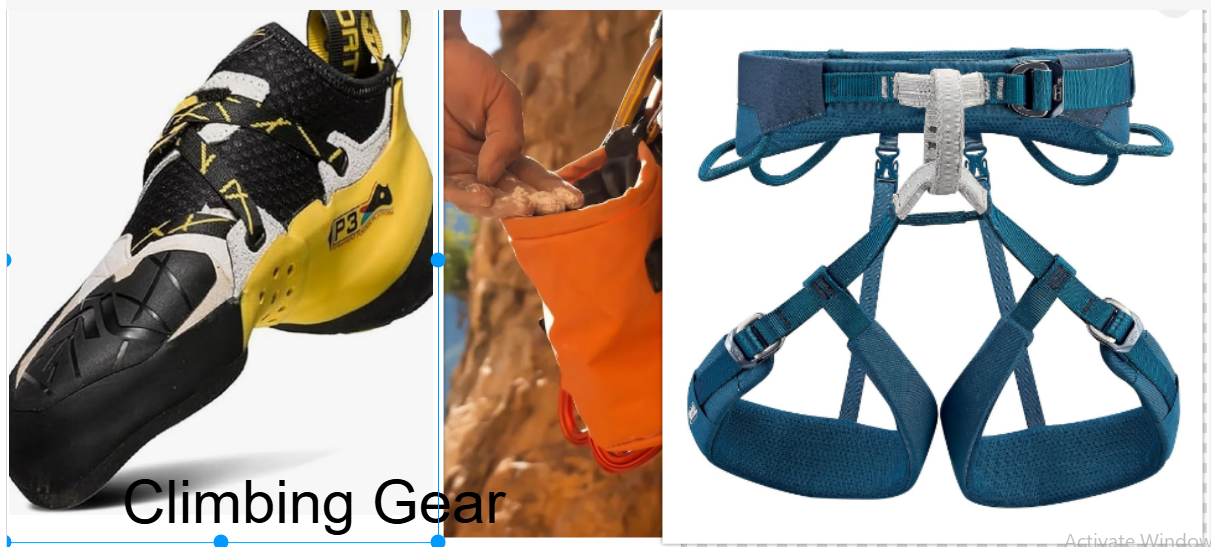
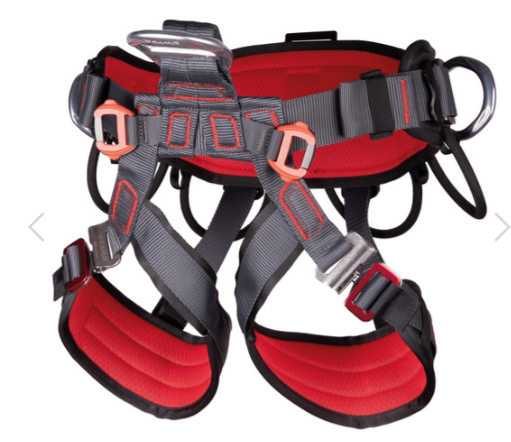
2. Climbing Harness
Different Types of Harnesses and How to Wear Them Safely
Harnesses are essential safety gear for rock climbing, rappelling, and other adventure activities. Choosing the right type of harness and wearing it correctly ensures both comfort and safety during your climb. Let’s dive into the different types of harnesses and the proper way to use them.
Types of Harnesses
1. Sit Harness
- Description: The most common type used in rock climbing, a sit harness wraps around the waist and thighs.
- Best For: Sport climbing, gym climbing, and traditional climbing.
- Key Features:
- Adjustable leg loops for comfort.
- Padding for extended use.
- Gear loops for attaching climbing tools.
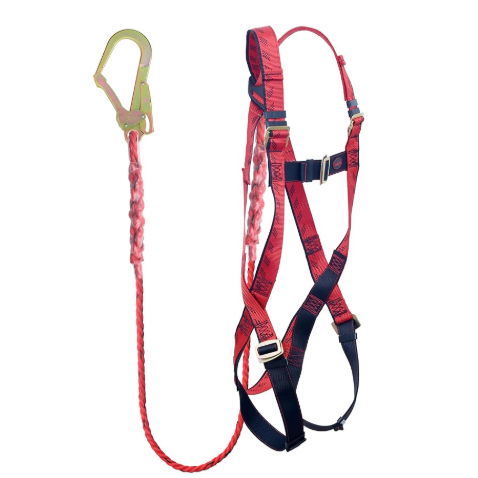
2. Full-Body Harness
- Description: A harness that supports both the upper and lower body.
- Best For: Beginners, children, or activities like via ferrata and mountaineering where the risk of flipping upside-down exists.
- Key Features:
- Extra straps over shoulders for additional stability.
- Reduces strain on the lower body.
3. Chest Harness
- Description: Worn around the chest and used in combination with a sit harness for added upper-body support.
- Best For: Cavers, big-wall climbers, or activities with heavy loads like hauling gear.
- Key Features:
- Helps balance weight distribution.
- Prevents inversion during falls.

4. Alpine Harness
- Description: A lightweight harness designed for alpine climbing and mountaineering.
- Best For: Ice climbing, glacier travel, and high-altitude trekking.
- Key Features:
- Minimal padding for easy portability.
- Wide adjustability to wear over layers.
5. Work Positioning Harness
- Description: Designed for industrial and construction purposes rather than recreational climbing.
- Best For: Tree climbing, tower work, and rope access jobs.
- Key Features:
- Multiple attachment points.
- Reinforced structure for prolonged wear.
How to Wear a Harness Safely
Wearing a harness correctly is crucial for your safety. Follow these steps to ensure your harness fits snugly and functions properly:
1. Inspect Your Harness
Before wearing the harness, check for:
- Any signs of wear and tear.
- Frayed stitching or damaged buckles.
- Manufacturer’s labels for weight limits and usage instructions.
2. Put On the Harness
- Step Into the Waist Belt: Slide your legs through the leg loops, ensuring the waist belt sits above your hips. This prevents the harness from slipping during a fall.
- Adjust the Leg Loops: Tighten the leg loops until they’re snug but not constricting. You should be able to fit two fingers between the strap and your leg.
- Center the Tie-In Loops: Ensure the tie-in points (where the rope attaches) are aligned at the center of your body.
3. Secure the Buckles
- Double-Back the Straps: If the harness has traditional buckles, always double-back the straps to prevent them from loosening.
- Check for Automatic Buckles: Modern harnesses often have auto-locking buckles, which make adjustments easier.
4. Test the Fit
- Perform a quick squat or lift your legs to ensure the harness stays in place.
- Check that the waist belt does not slide down when pulled firmly.
5. Attach Safety Equipment
- Use a locking carabiner to connect your harness to the climbing rope.
- Always double-check knots and attachment points with your partner before starting your climb.
Tips for Harness Safety
- Regular Maintenance: Clean your harness after use, especially if it’s exposed to dirt or chalk. Store it in a dry place away from direct sunlight.
- Replace When Necessary: Retire your harness if it’s over five years old or shows visible signs of damage.
- Manufacturer Guidelines: Follow the instructions provided by the harness manufacturer for proper usage and care.
- Partner Checks: Always perform a partner safety check to ensure the harness is secure before climbing.
Wearing the right harness and securing it properly can make all the difference in your climbing experience. Whether you’re scaling cliffs in Ramanagara or tackling a gym climbing wall, ensure your harness is your most trusted companion on every climb.

- Types:
- Sit Harness: Most common, designed to support the climber from the waist.
- Full-body Harness: Offers additional support, typically used for children or special cases.
- Chest Harness: Sometimes used in conjunction with a sit harness for extra safety in specific climbing scenarios.
3. Slings
What Are Slings?
In climbing and adventure sports, slings are loops of strong, durable material used as versatile tools for a variety of purposes. They are typically made from nylon or Dyneema (ultra-high-molecular-weight polyethylene), offering high strength and abrasion resistance. Slings come in different lengths, widths, and designs, with sewn or knotted closures.
Uses of Slings in Climbing and Adventure Activities
1. Anchoring
- Purpose: Slings are used to create secure anchor points by wrapping them around rocks, trees, or artificial anchors.
- Example: Setting up a belay station or securing yourself to the rock face.
2. Extending Protection
- Purpose: To reduce rope drag, slings are used to extend quickdraws or connect to protection (e.g., cams, nuts, bolts) farther from the climbing line.
- Example: In trad climbing, slings extend cams and nuts to allow the rope to run smoothly.
3. Equalizing Anchor Points
- Purpose: Slings are used to distribute the load evenly between multiple anchor points, enhancing safety and stability.
- Example: In a multi-pitch climb, slings help equalize the force on two or more anchor points.
4. Self-Belay or Personal Safety
- Purpose: Climbers use slings to tether themselves to anchor points when resting or setting up routes.
- Example: A sling as a personal anchor system (PAS) during belay changes.
5. Rappelling
- Purpose: Slings can be used to create rappel anchors by tying them around natural features or fixed hardware.
- Example: Looping a sling around a tree or rock for a rappel descent.
6. Carrying Gear
- Purpose: Slings act as improvised gear holders, allowing climbers to clip items like shoes, water bottles, or extra equipment to their harness.
- Example: Using a sling to organize gear on a climbing rack.
7. Rescue and Hauling
- Purpose: Slings can be used in hauling systems or as part of a pulley setup for rescue scenarios.
- Example: Assisting a climber in distress or hoisting gear to higher levels.
8. Protection in Alpine and Ice Climbing
- Purpose: In ice climbing or alpine climbing, slings wrap around natural features like icicles or horns for temporary protection.
- Example: Securing an anchor when placing screws isn’t feasible.
9. Improvised Climbing Tools
- Purpose: In emergencies, slings can be used as makeshift harnesses, foot loops, or prusiks (friction knots) for ascending ropes.
- Example: Using a sling as an ascender in self-rescue scenarios.
Types of Slings
1. Sewn Slings
- Pre-manufactured and stitched together for durability.
- Advantages: Lighter, stronger, and less bulky than tied slings.
- Common Use: Climbing and alpine applications.
2. Tied Slings
- Made by tying a knot in a length of cord or webbing.
- Advantages: Adjustable and reusable.
- Common Use: Custom lengths for specific purposes.
3. Dyneema Slings
- Lightweight, resistant to moisture, and compact.
- Advantages: Ideal for alpine and ice climbing where weight matters.
- Consideration: Less resistant to friction and heat compared to nylon.
4. Nylon Slings
- Durable and slightly stretchy for better impact absorption.
- Advantages: Affordable and more abrasion-resistant than Dyneema.
- Common Use: General climbing and anchor building.
How to Use Slings Safely
- Inspect Regularly:
- Check for frays, cuts, or damage before every use.
- Retire slings that show significant wear or have been involved in a fall.
- Avoid Sharp Edges:
- Protect slings from rubbing against sharp rocks or edges that can weaken the material.
- Proper Knots:
- Use appropriate knots, like the overhand knot or girth hitch, to secure slings effectively.
- Weight Limit Awareness:
- Stay within the manufacturer’s recommended load capacity for your sling.
- Sunlight and Heat:
- Avoid prolonged exposure to UV light and heat, which can degrade materials over time.
- Dynamic vs. Static Loads:
- Do not use slings for dynamic falls unless they are specifically designed for impact absorption.
Slings are indispensable tools in climbing and adventure sports. With proper use and care, they enhance safety, versatility, and efficiency during your outdoor escapades!
Webbing
What Is Webbing?
Webbing refers to flat, strong, woven strips of material commonly used in climbing, outdoor sports, and various adventure activities. Typically made from nylon or Dyneema (UHMWPE), webbing is versatile and widely relied upon for creating anchors, slings, harnesses, and safety systems.
Webbing comes in two main styles:
- Tubular Webbing:
- Hollow, tube-like structure.
- More flexible and durable.
- Common Use: Climbing and rescue operations.
- Flat Webbing:
- Single-layered, flat strip.
- Less flexible but lighter and thinner.
- Common Use: Backpack straps and less abrasive applications.
Uses of Webbing in Climbing and Outdoor Activities
1. Anchor Systems
- Purpose: Webbing is used to create strong and secure anchors by wrapping it around natural or artificial features.
- Example: Wrapping webbing around a rock or tree to set up a top-rope climbing anchor.
2. Slings
- Purpose: Webbing can be tied into loops to serve as slings for climbing protection or extending gear.
- Example: Using a webbing sling to extend a cam placement in trad climbing.
3. Rappelling
- Purpose: Webbing is often used to construct rappel anchors.
- Example: Leaving a loop of webbing around a rock horn as part of a rappel setup.
4. Rescue Systems
- Purpose: Used in pulley setups or as improvised harnesses in emergency situations.
- Example: Forming a makeshift chest or seat harness using webbing in a rescue scenario.
5. Slacklining
- Purpose: Webbing is the primary material for slacklines, offering a balance platform for recreational use.
- Example: Stretching webbing between two trees for balancing practice.
6. Securing Gear
- Purpose: Webbing can secure items like packs or tools during climbing or travel.
- Example: Tying down gear on a vehicle roof rack using webbing straps.
7. Belay Systems
- Purpose: Webbing loops are sometimes used as part of belay stations.
- Example: Linking multiple anchor points into an equalized belay anchor.
Advantages of Webbing
- Versatility:
- Can be tied, knotted, or sewn into various configurations.
- Durability:
- Resistant to abrasion and weather conditions.
- Lightweight:
- Easy to carry, even in longer lengths.
- High Strength:
- Designed to handle significant weight and force.
- Cost-Effective:
- Affordable compared to some climbing-specific gear.
Knots Commonly Used with Webbing
- Water Knot:
- Ideal for tying webbing into loops.
- Common for creating slings and anchors.
- Overhand Knot:
- Simple and quick knot for securing webbing.
- Used as a backup or stopper knot.
- Girth Hitch:
- For attaching webbing to harnesses or anchors.
- Easy to adjust and secure.
- Clove Hitch:
- Used to secure webbing to fixed points like carabiners.
Safety Tips for Using Webbing
- Inspect Regularly:
- Look for fraying, cuts, or UV damage. Retire webbing if any wear is noticeable.
- Avoid Overloading:
- Stay within the load limits specified by the manufacturer.
- Use Correct Knots:
- Incorrect knots can weaken the webbing significantly.
- Prevent Abrasion:
- Protect webbing from rubbing against sharp edges.
- Avoid Long Exposure to Sunlight:
- Prolonged UV exposure weakens nylon webbing.
- Avoid Shock Loading:
- Webbing is not dynamic and isn’t designed to absorb sudden loads like climbing ropes.
Differences Between Webbing and Slings
| Feature | Webbing | Slings |
|---|---|---|
| Material | Flat or tubular woven material | Pre-sewn loops made from webbing |
| Flexibility | Can be tied into custom lengths | Fixed sizes; no tying required |
| Usage | Versatile for various applications | Specific uses like anchors or gear |
| Convenience | Requires knotting; more adjustable | Ready-to-use but less customizable |
Webbing is an indispensable tool for climbers, adventurers, and rescue professionals. Its adaptability and strength make it a vital piece of gear in many outdoor scenarios
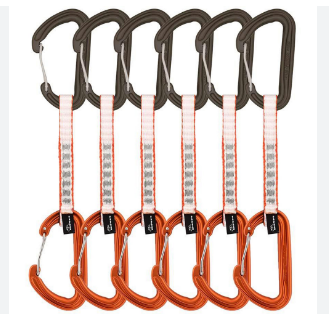
4. Quickdraws

What Are Quickdraws?
Quickdraws are essential pieces of climbing equipment used to connect climbing ropes to protection points like bolts or cams. They allow climbers to safely and efficiently progress up a route while minimizing rope drag and ensuring smooth movement.
A typical quickdraw consists of two carabiners connected by a short loop of durable webbing (known as a dogbone).
Components of a Quickdraw
- Carabiners:
- Top Carabiner: Clipped to the protection point (like a bolt or cam). Often plain or straight-gate for easy attachment.
- Bottom Carabiner: Clipped to the climbing rope. Typically features a bent gate for smoother clipping.
- Locking or Non-Locking: Most quickdraw carabiners are non-locking for ease of use during climbs.
- Dogbone:
- The webbing loop connecting the two carabiners.
- Made from materials like nylon or Dyneema.
- Reinforced to handle high loads while minimizing weight.
Uses of Quickdraws
- Sport Climbing:
- Clip one carabiner to pre-installed bolts on a route and the other to your rope to secure yourself as you climb.
- Trad Climbing:
- Attach one carabiner to your gear placement (like cams or nuts) and the other to your rope.
- Top-Rope Anchors:
- Quickdraws are used to create quick, temporary anchors.
- Minimizing Rope Drag:
- Quickdraws provide a flexible connection that allows the rope to move freely, reducing friction and drag during climbing.
- Safety in Falls:
- Absorb some of the shock force during a fall by creating a dynamic link between the protection point and the rope.
Advantages of Using Quickdraws
- Ease of Use:
- Quick and efficient to clip in while climbing.
- Reduces Rope Drag:
- Keeps the rope movement smooth, especially on routes with zigzags or overhangs.
- Versatility:
- Suitable for sport, trad, and even ice climbing setups.
- Lightweight:
- Modern quickdraws are made with lightweight materials for easy carrying.
- Safety:
- Designed to handle high fall forces, ensuring reliability.
How to Use Quickdraws Safely
- Clip Properly:
- Always clip the bolt or cam with the top carabiner and the rope with the bottom carabiner.
- Ensure the rope runs smoothly through the carabiner without twists.
- Face Gate Direction Correctly:
- Gates should face away from the climbing direction to prevent unintentional un-clipping.
- Check for Cross-Loading:
- Make sure carabiners are aligned properly to avoid cross-loading, where the force is applied perpendicular to the spine (weakest point).
- Inspect for Wear:
- Regularly check dogbones and carabiners for signs of fraying, sharp edges, or deformation.
- Avoid Back-Clipping:
- When clipping the rope, ensure it enters the carabiner from the inside and exits through the gate opening (not from the outside).
- Don’t Use Quickdraws as Anchors for Extended Periods:
- While temporary anchors are fine, longer durations can weaken the webbing due to wear or UV exposure.
Types of Quickdraws
- Standard Quickdraws:
- Feature two solid carabiners connected by nylon or Dyneema webbing.
- Ideal for sport climbing.
- Wiregate Quickdraws:
- Use wiregate carabiners for reduced weight and resistance to freezing in alpine conditions.
- Best for trad or ice climbing.
- Hybrid Quickdraws:
- One solid-gate carabiner for bolts and one wiregate carabiner for the rope.
- Combines the benefits of both types.
- Alpine Quickdraws:
- Longer webbing slings that can be extended to reduce rope drag on wandering routes.
- Commonly used in trad and alpine climbing.
Safety Tips for Quickdraw Use
- Orientation Matters:
- The carabiner gate facing the wrong direction can unclip during a fall.
- Dogbone Wear:
- Rotate or replace dogbones if they show excessive wear in one spot.
- Rope-End Carabiner:
- Always use the same carabiner for the rope to avoid sharp edges that could damage it.
- Inspect Regularly:
- Check for bent gates, damaged webbing, or signs of overloading.
Quickdraws are an indispensable part of climbing gear. They combine ease of use, lightweight design, and safety, making them essential for every climber—from beginners to seasoned professionals.
- Purpose: Quickdraws are used to connect the climbing rope to bolts or other protection points. They consist of two carabiners, one of which is attached to a sling.
5. Belay Device
What is a Belay Device?
A belay device is an essential piece of climbing equipment used to manage the rope during climbing activities. It allows a belayer to control the rope’s movement, catch a climber’s fall, and assist in lowering them safely. Belay devices are designed to increase friction, making it easier to manage the rope with minimal effort.
Types of Belay Devices
- Tubular Belay Devices
- Description: The most common type, shaped like a tube or a plate.
- Features: Lightweight, simple, and versatile.
- Uses: Suitable for both lead climbing and top-rope belaying.
- Advantages: Works with a wide range of rope diameters and can be used for belaying two climbers simultaneously.
- Examples: Black Diamond ATC, Petzl Reverso.

- Assisted-Braking Belay Devices
- Description: Designed to provide additional friction when catching falls.
- Features: Includes a camming mechanism that locks the rope in place under load.
- Uses: Popular for sport climbing and gym climbing.
- Advantages: Easier to hold falls and lower climbers, especially for heavier partners.
- Examples: Petzl GriGri, Edelrid Mega Jul.
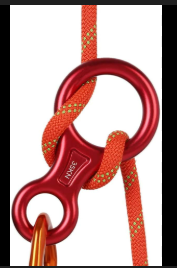
- Figure-8 Belay Devices
- Description: Shaped like the number 8, primarily used for rappelling.
- Features: Offers smooth rope handling during descents.
- Uses: Not ideal for standard belaying, but excellent for abseiling and rescue operations.
- Advantages: Simple design and lightweight.
- Examples: Black Diamond Super 8.
- Guide Mode Belay Devices
- Description: A tubular device with an additional loop for guide mode.
- Features: Allows hands-free belaying from an anchor for a second climber.
- Uses: Multi-pitch climbing and guiding.
- Advantages: Adds functionality for advanced climbing setups.
How to Use a Belay Device Safely
- Threading the Rope:
- Ensure the rope is threaded correctly through the device as per the manufacturer’s guidelines.
- Match the climber’s rope end to the “climber” side and the brake rope to the “brake” side.
- Hand Positioning:
- Always keep one hand on the brake rope to maintain control.
- Use the proper belay technique, such as the PBUS method (Pull, Brake, Under, Slide).
- Check Compatibility:
- Match the belay device to the rope diameter and type (dynamic or static).
- Use a Locking Carabiner:
- Attach the belay device to the harness or anchor using a locking carabiner to prevent accidental unclipping.
- Communication:
- Confirm commands like “On belay?” and “Climbing!” before starting.
- Practice in a Controlled Environment:
- Beginners should practice belaying under supervision to master the technique.
Advantages of Using a Belay Device

- Increased Friction: Makes catching falls and lowering climbers safer and easier.
- Efficient Rope Management: Ensures smooth feeding and controlled braking.
- Versatility: Can be used for belaying, rappelling, or rescue operations.
- Enhanced Safety: Modern designs provide additional features like assisted braking.
Choosing the Right Belay Device
- For Beginners: Tubular devices like the ATC are easy to learn and use.
- For Sport Climbing: Assisted-braking devices offer added safety.
- For Multi-Pitch Climbing: Guide-mode devices add versatility for advanced scenarios.
- For Rappelling: Figure-8 devices provide a smooth descent.
Tips for Maintaining Your Belay Device
- Inspect Regularly: Check for wear or sharp edges that could damage ropes.
- Clean After Use: Remove dirt and debris to ensure smooth operation.
- Follow Manufacturer Guidelines: Adhere to weight limits and compatibility recommendations.
Belay devices are indispensable tools for climbers of all skill levels, combining safety, control, and convenience. Proper use and regular maintenance ensure a safe and enjoyable climbing experience!
6. Chalk and Chalk Bag
Chalk and Chalk Bag: Essential Climbing Gear
Chalk and chalk bags are fundamental tools for climbers to maintain grip and ensure safety on challenging routes. Here’s everything you need to know about them:
What is Chalk?
Climbing chalk is made of magnesium carbonate, a fine white powder that absorbs moisture and reduces hand sweat. It enhances grip, making it easier for climbers to hold onto rock or gym holds securely.

- Forms of Chalk:
- Loose Chalk: Lightweight and easy to use but prone to spills.
- Chalk Balls: Fine chalk encased in a fabric pouch, reducing mess and ensuring controlled application.
- Liquid Chalk: A mix of chalk and alcohol that dries quickly, leaving a thin, even coating on hands.
- Block Chalk: Compressed solid chalk that can be broken into desired sizes.
What is a Chalk Bag?
A chalk bag is a small pouch designed to hold climbing chalk, allowing climbers to access it during climbs without needing to stop or descend.
- Features of a Chalk Bag:
- Opening: Wide enough for easy hand access.
- Drawstring Closure: Keeps chalk secure and prevents spills when not in use.
- Lining: Soft fabric, such as fleece, to help distribute chalk evenly.
- Attachment Points: Typically includes loops or belts to fasten around the waist.
- Brush Holder: Some bags feature slots for carrying a small brush to clean climbing holds.
Uses of Chalk
- Improved Grip: Absorbs moisture and keeps hands dry, enhancing friction on holds.
- Confidence: Reduces the fear of slipping, allowing climbers to focus on technique.
- Essential for Difficult Climbs: Particularly useful on overhangs, slabs, and technical routes where secure grip is crucial.
Advantages of Using Chalk and Chalk Bags
- Enhanced Safety: Better grip reduces the risk of slipping, minimizing accidents.
- Convenience: Chalk bags allow climbers to reapply chalk mid-route without breaking stride.
- Customizable Options: Available in various sizes, designs, and materials to suit individual preferences.
How to Use Chalk and Chalk Bags
- Filling the Bag: Add a small amount of loose chalk or a chalk ball into the chalk bag. Avoid overfilling, as it can lead to wastage.
- Proper Application: Dip fingers or hands into the bag and rub chalk evenly across your palms and fingertips.
- Reapply as Needed: Use the chalk bag during climbs to refresh your grip, especially on longer routes.
Safety Tips for Using Chalk
- Avoid Over-Chalking: Too much chalk can reduce friction instead of improving it.
- Keep the Environment in Mind: Excessive use of loose chalk can contribute to environmental degradation. Consider eco-friendly options like liquid chalk.
- Inspect Chalk Bags Regularly: Ensure the drawstring works properly and the bag is securely attached to your harness or waist.
Types of Chalk Bags
- Small Bags: Lightweight and compact, ideal for bouldering and short climbs.
- Large Bags: Designed for climbers with larger hands or for longer climbs where more chalk is needed.
- Chalk Buckets: Used primarily for bouldering, these larger bags sit on the ground and allow for both hands to be chalked simultaneously.
Care and Maintenance of Chalk and Chalk Bags
- Clean Regularly: Remove old chalk and wash the bag occasionally to avoid buildup of debris.
- Seal Properly: Always close the drawstring tightly to prevent spills during transit.
- Store in a Dry Place: Keep chalk dry to maintain its effectiveness.
Eco-Friendly Alternatives
With increasing focus on sustainability, climbers are opting for:
- Eco-Chalk: Made with less harmful materials.
- Reusable Chalk Balls: Minimize waste compared to loose chalk.
- Liquid Chalk: Reduces airborne particles, making it ideal for indoor climbing gyms.
Chalk and chalk bags are simple yet crucial tools that significantly impact climbing performance. Choosing the right type and using them effectively can make a big difference, whether you’re bouldering, sport climbing, or taking on alpine routes.
- Purpose: Chalk absorbs sweat from the climber’s hands to maintain grip. Chalk bags are usually attached to the harness for easy access.
7. Crash Pads
Crash Pads: Essential Gear for Bouldering Safety
Crash pads are portable mats designed to provide a cushioned landing surface for climbers when they fall or jump off during bouldering. These pads play a crucial role in minimizing injuries by absorbing the impact of a fall. Here’s a comprehensive guide to understanding crash pads and their importance.
What is a Crash Pad?
A crash pad is a thick, durable foam mat specifically designed for bouldering. It is placed below climbing routes to protect climbers when they fall, particularly during outdoor climbing on rocks.
- Materials:
- Outer shell: Made of tough nylon or polyester to withstand abrasions.
- Inner foam: Multi-layered foam for shock absorption, combining softer foam for comfort and firmer foam for impact resistance.
- Sizes:
- Small Pads: Lightweight and compact, ideal for short climbs or traverses.
- Large Pads: Provide broader coverage, suitable for higher climbs or complex routes.
Components of a Crash Pad
- Foam Layers:
- Closed-Cell Foam (Top Layer): Distributes the impact evenly across the pad.
- Open-Cell Foam (Bottom Layer): Provides cushioning and absorbs the force of the fall.
- Outer Fabric:
- Durable and tear-resistant, often water-resistant or waterproof.
- Hinge or Taco Design:
- Hinge Crash Pads: Fold in half for easy portability but may have gaps where the hinge folds.
- Taco Crash Pads: Bend into a single fold without gaps, offering continuous foam coverage but are harder to transport.
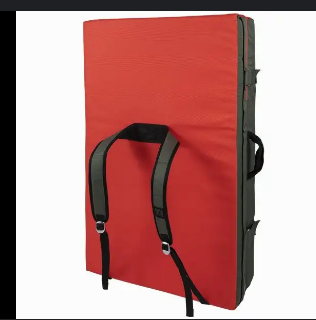
- Carrying Straps:
- Backpack-style straps make it easier to carry crash pads to climbing spots.
Uses of Crash Pads
- Safety During Bouldering:
- Protect climbers from injuries caused by falls.
- Provide cushioning for unexpected slips.
- Support for Spotters:
- Helps spotters position themselves effectively and guide climbers toward a safe landing.
- Comfort Between Climbs:
- Acts as a seat or rest area when not climbing.
- Protecting the Environment:
- Prevents damage to delicate vegetation or soil beneath climbing routes.
Advantages of Using Crash Pads
- Enhanced Safety: Absorbs impact to reduce injury risk during falls.
- Portability: Lightweight designs allow climbers to carry them to remote bouldering locations.
- Durability: Built to withstand repeated use and tough outdoor conditions.
- Versatility: Can be used for indoor and outdoor bouldering.
How to Use a Crash Pad Effectively
- Placement:
- Place the pad directly under the climbing route or projected fall zone.
- Adjust its position as you progress through the climb.
- Overlap Pads:
- When using multiple crash pads, overlap their edges to eliminate gaps that could cause injuries.
- Spotter Coordination:
- A spotter can help guide the climber’s fall and reposition the crash pad as needed.
- Check for Stability:
- Ensure the pad is on a flat, stable surface to avoid shifting during a fall.
- Be Aware of Obstacles:
- Remove rocks, branches, or uneven surfaces beneath the pad to ensure smooth impact absorption.
Types of Crash Pads
- Regular Crash Pads:
- Standard size and thickness, suitable for most bouldering routes.
- Oversized Crash Pads:
- Larger surface area for highball bouldering (taller routes).
- Supplemental Pads:
- Thin pads used to cover gaps or protect specific areas.
Safety Tips for Using Crash Pads
- Inspect Regularly: Check for tears, worn foam, or other damage that might compromise effectiveness.
- Use a Spotter: While crash pads are essential, a spotter adds an extra layer of safety by guiding falls.
- Position Pads Strategically: Always anticipate where a fall might occur and place the pad accordingly.
- Avoid Overloading Pads: Prolonged sitting or heavy objects can compress the foam, reducing its shock-absorbing properties over time.
Care and Maintenance of Crash Pads
- Clean Regularly: Remove dirt and debris from the surface to prolong durability.
- Store Properly: Keep the pad in a dry place to avoid mold or foam degradation.
- Avoid Sharp Objects: Prevent punctures by keeping the pad away from sharp rocks or tools.
- Replace Worn-Out Pads: Replace your crash pad when the foam loses its firmness or the outer shell is significantly damaged.
Choosing the Right Crash Pad
When selecting a crash pad, consider:
- Size and Thickness: For higher falls, choose thicker pads.
- Portability: Look for lightweight designs with comfortable carrying straps.
- Durability: Opt for high-quality materials that can withstand rugged use.
- Foam Quality: Multi-density foam ensures both comfort and impact resistance.
Crash pads are an indispensable part of bouldering gear. By providing reliable protection, they enable climbers to focus on technique and enjoy the thrill of climbing with confidence and safety.
- Purpose: Cushions falls during bouldering, offering protection from short-distance falls. Essential for reducing the risk of injury.
8. Prusik Cord
- Purpose: A loop of cord used in self-rescue techniques, typically to ascend a rope or create a backup knot during rappelling.
9. Climbing Shoes
What Are Climbing Shoes?
Climbing shoes are specialized footwear designed to maximize friction, sensitivity, and control while climbing. They feature a snug fit, sticky rubber soles, and a construction that aids in technical footwork on vertical and overhanging surfaces.
- Material:
- Uppers: Leather or synthetic materials for durability and comfort.
- Soles: Sticky rubber for superior grip.
- Rand: Reinforced rubber along the toe and sides for extra durability.
- Fit:
- Designed to be snug to minimize movement inside the shoe and maximize precision.

Key Features of Climbing Shoes
- Rubber Sole:
- Provides exceptional grip on rock or gym walls.
- Varying stiffness for different climbing styles.
- Toe Box:
- Rounded or pointed depending on the shoe type.
- Helps in edging, smearing, or toe-hooking.
- Closure Systems:
- Velcro Straps: Easy to put on and take off; great for gym climbing.
- Laces: Offer a customizable fit, ideal for trad and multi-pitch climbs.
- Slip-Ons: Minimalist design for bouldering and training.
- Shape:
- Neutral: Flat sole for comfort; good for beginners or long climbs.
- Moderate: Slight downturn for versatile climbing.
- Aggressive: Pronounced downturn for overhangs and advanced routes.
- Heel Cup and Arch:
- Designed for hooking and maintaining foot tension on challenging routes.
Why Are Climbing Shoes Important?
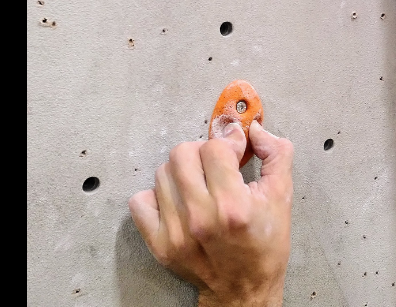
- Grip and Friction:
- Sticky rubber soles ensure your feet stay securely on footholds, whether on rock or gym walls.
- Precision:
- Snug fit and shaped toe boxes allow climbers to place their feet on small holds with accuracy.
- Support:
- Stiff shoes provide support on edges, while soft shoes enhance sensitivity for smearing.
- Performance Enhancement:
- Enables climbers to execute advanced techniques like edging, heel hooking, and toe jamming.
- Safety:
- Prevents slipping and reduces the risk of injuries during climbs.
Types of Climbing Shoes
- Neutral Shoes:
- Best for beginners or long climbs.
- Comfortable with a flat sole.
- Moderate Shoes:
- Slightly downturned for technical climbing.
- Suitable for all-around use, including sport and trad climbing.
- Aggressive Shoes:
- Highly downturned with a pointed toe.
- Ideal for advanced climbers tackling overhanging routes or bouldering.
Choosing the Right Climbing Shoes
- Fit:
- A snug fit without causing pain. Your toes should slightly curl but not be cramped.
- Climbing Style:
- Neutral for beginners or multi-pitch routes.
- Moderate for versatility.
- Aggressive for steep, technical climbs.
- Material:
- Leather shoes stretch over time, while synthetic shoes maintain their shape.
- Closure System:
- Choose Velcro for convenience, laces for adjustability, or slip-ons for simplicity.
- Durability:
- High-quality rubber and reinforced toes for longer-lasting performance.
Tips for Using Climbing Shoes
- Break Them In:
- Wear new shoes for short sessions to allow them to mold to your feet.
- Keep Them Clean:
- Wipe off dirt and chalk from the soles after each use to maintain grip.
- Remove After Climbing:
- Take off climbing shoes between climbs to prevent discomfort and prolong their lifespan.
- Use the Right Shoe for the Job:
- Use aggressive shoes for overhangs and neutral ones for extended climbs.
- Resole When Needed:
- Replace the sole when it begins to wear out instead of buying a new pair.
Advantages of Climbing Shoes
- Enhanced Performance: Designed specifically for climbing, they help climbers tackle challenging routes.
- Increased Precision: Allows for accurate foot placements on small holds.
- Improved Safety: Reduces the risk of slips and falls.
- Durability: Built to withstand the wear and tear of climbing.
Care and Maintenance
- Clean Regularly:
- Use a damp cloth to wipe the soles and remove chalk or dirt.
- Avoid Heat and Sunlight:
- Direct sunlight can degrade rubber and cause cracking.
- Store Properly:
- Keep shoes in a cool, dry place.
- Resole:
- Extend the life of your shoes by resoling when the rubber starts to wear out.
Common Mistakes to Avoid
- Buying Shoes That Are Too Tight: Painful shoes can lead to discomfort and injuries.
- Wearing Shoes for Non-Climbing Activities: This can damage the soles and reduce their effectiveness.
- Ignoring Signs of Wear: Regularly inspect for damage and get them repaired when necessary.
Climbing shoes are an essential investment for climbers of all levels. Choosing the right pair, maintaining them, and using them properly can greatly enhance your climbing experience while ensuring safety and durability.
- Purpose: Provides grip, support, and flexibility to the climber’s feet. Soft material shoes are often used for bouldering and sport climbing.
10. Rope Protector
- Purpose: Protects the rope from sharp edges or abrasive surfaces during a climb or rappel, extending the rope’s lifespan.
11. Hauling Bags
- Purpose: These are used to carry extra gear or supplies during long climbs, especially in multi-pitch climbs or big wall climbing.
12. Bouldering Pads
- Purpose: Used in bouldering to cushion the fall when climbing short, non-roped routes (boulders). They are lightweight, portable, and designed for quick setup.
Other Soft Gear Items:
- Camming Devices Slings: For attaching cams (mechanical protection) to the harness or gear loop.
- Climbing Tape: Used to protect fingers, hands, or wrists from abrasions and blisters during long climbing sessions.
- Climbing Pack: Soft, lightweight backpacks used to carry all climbing gear, food, and other necessities.
These pieces of soft gear are integral to climbing safety, comfort, and performance. While hard gear like carabiners and protection devices are also essential, the soft gear helps in securing the climber, aiding movement, and protecting both the climber and their gear.
For specific brands and further equipment options, check with trusted climbing gear retailers or climbing communities.
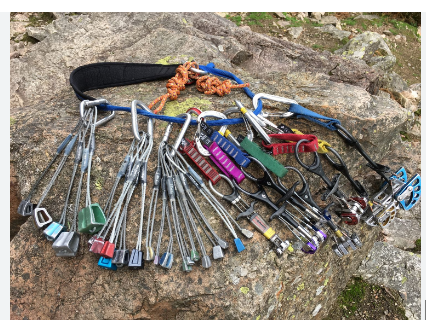
Rock climbing equipment Hord gares
In rock climbing, “hard gear” refers to the durable, often metal-based equipment used to secure climbers, protect from falls, and create anchors. This gear is essential for protection, belaying, and navigating more technical climbs. Here’s a list of key “hard gear” used in rock climbing:
1. Carabiners
Carabiners: The Essential Tool for Climbing and Outdoor Adventures
Carabiners are one of the most versatile and indispensable tools in climbing, outdoor activities, and safety systems. These small but mighty metal loops with spring-loaded gates are designed to connect ropes, harnesses, and other equipment securely.
Here’s everything you need to know about carabiners, their types, and how to use them effectively.
1. What Are Carabiners?
A carabiner is a specialized metal loop with a spring-loaded gate that opens and closes. It’s used in various activities, such as:
- Climbing: Attaching ropes and securing gear.
- Rescue Operations: Linking safety equipment in life-saving scenarios.
- Outdoor Sports: Camping, zip-lining, and mountaineering.
- Industrial Safety: In construction and rope access work.
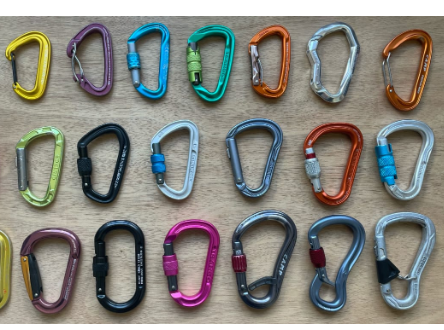
2. Types of Carabiners
Based on Shape
- D-Shaped Carabiners:
- Strongest design; forces the load toward the spine.
- Ideal for climbing anchors.
- Oval Carabiners:
- Balanced shape; evenly distributes weight.
- Great for racking gear or using with pulleys.
- HMS or Pear-Shaped Carabiners:
- Wider opening; perfect for belaying and tying clove hitches.
- Asymmetric D-Shaped Carabiners:
- Lightweight and ergonomic; popular for sport climbing.
Based on Locking Mechanism
- Non-Locking Carabiners:
- Basic design with a simple spring-loaded gate.
- Commonly used for racking gear.
- Locking Carabiners:
- Include a mechanism to prevent accidental gate opening.
- Subtypes:
- Screw-Lock: Requires manual screwing to lock.
- Auto-Lock: Locks automatically when released.
- Twist-Lock: A two-step lock for quick security.
3. Key Features to Look For
- Material: Usually made of aluminum (lightweight) or steel (durable and strong).
- Gate Type: Straight gate, bent gate (for clipping ropes), or wire gate (lightweight and less prone to freezing).
- Strength Ratings: Check for kilonewtons (kN) markings, indicating strength in different orientations:
- Major Axis: Main strength (spine side).
- Minor Axis: Weaker when used sideways.
- Open Gate: Much weaker; avoid using it this way.
4. How to Use Carabiners Safely
- Inspect Regularly: Check for cracks, corrosion, or bent gates before use.
- Proper Orientation: Always load carabiners along the spine (major axis).
- Close the Gate: Ensure the gate is fully closed or locked before applying weight.
- Avoid Cross-Loading: Don’t let the load be applied to the gate or minor axis.
5. Common Applications
- Climbing:
- Connecting ropes to protection points.
- Securing harnesses to belay devices.
- Mountaineering:
- Building anchors in snow and ice conditions.
- Rescue and Rigging:
- Used with pulleys and rope systems.
- Everyday Uses:
- Carrying gear, securing items, or as keychain clips.
6. Maintenance Tips
- Clean with water and dry thoroughly after exposure to dirt or salt.
- Lubricate hinges and locks periodically for smooth operation.
- Store in a cool, dry place away from chemicals.
Conclusion
Carabiners are the unsung heroes of outdoor adventures and safety systems. Choosing the right type of carabiner for your activity and using it properly is essential for performance and safety. Whether you’re scaling cliffs, organizing gear, or securing loads, having the right carabiner can make all the difference.
Gear up and climb with confidence! 🧗
- Purpose: Used to connect ropes, slings, or other climbing equipment. They are available in locking and non-locking varieties.
- Locking Carabiners: Essential for belaying and securing rope to anchors.
- Non-locking Carabiners: Often used for quickdraws or for clipping equipment.
2. Cams (Spring-loaded Camming Devices)
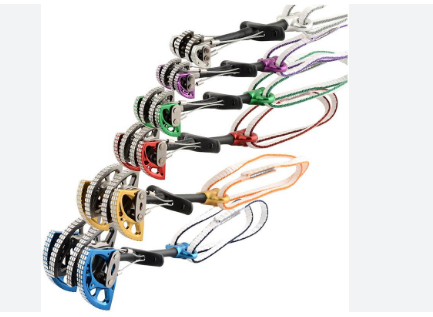
- Purpose: These are used in trad (traditional) climbing for protection. They expand within rock cracks to provide a secure anchor.
- Key Feature: Adjustable to different crack sizes, making them versatile for various terrains.
3. Nuts (Wired Nuts)
- Purpose: Wedge-shaped pieces of metal that are placed in cracks to provide passive protection.
- Key Feature: Used in traditional climbing, these are typically lighter than cams and are useful for narrower cracks.
4. Pitons
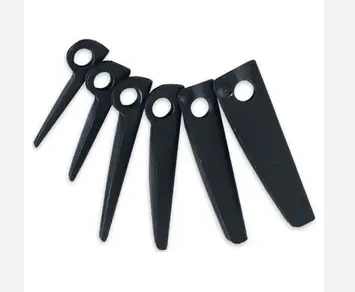
- Purpose: Metal spikes hammered into cracks to provide protection. Less commonly used today but still a part of historical climbing gear.
- Key Feature: Ideal for rock types that do not accept other forms of protection.
5. Quickdraws
- Purpose: Connects the rope to bolts or other fixed protection points during sport climbing. Composed of two carabiners connected by a sling.
- Key Feature: Reduces rope drag and allows easy clipping of the rope during lead climbs.
6. Hexes
- Purpose: Larger than nuts, hexes are used to secure protection in wider cracks. They are placed in cracks and can be rotated for a better fit.
- Key Feature: Provides more surface area contact with the rock compared to nuts.
7. Rope Protection (Rope Protectors)
- Purpose: Protects the climbing rope from abrasion against rough rock surfaces or sharp edges.
- Key Feature: Typically made from durable materials, they can be used during rappelling or traversing sharp rock edges.
8. Belay Devices (Assisted Braking Devices)
- Purpose: Used by the belayer to manage the rope tension and catch a climber’s fall. Some devices automatically engage a brake when the climber falls, adding an extra layer of safety.
- Popular Models:
- ATC (Air Traffic Controller): A basic device for managing rope friction.
- Grigri: A mechanical belay device with assisted braking for added safety.
9. Climbing Hardware (Anchor Gear)
- Purpose: Includes items like slings, cords, and webbing used to build anchors and secure ropes.
- Key Feature: Essential in multi-pitch climbing for creating reliable, secure anchor points.
10. Ascenders

- Purpose: Devices used to ascend a rope, either in aid climbing or for self-rescue situations. They grip the rope as the climber ascends.
- Types: Rope and chest ascenders, often used in combination for rope access climbing.
11. Chocks
- Purpose: Small devices that fit into small cracks to provide passive protection. Typically used in aid climbing or where quick setups are needed.
12. Rappel Rings or Descenders
- Purpose: Used for rappelling down from a climb. These devices help control the speed of descent.
- Key Feature: Allows for smooth, controlled rappels while managing the rope’s friction.
13. Spikes/Climbing Hammers
- Purpose: Used in aid climbing, where the climber inserts spikes into the rock to create a hold.
- Key Feature: Commonly used in conjunction with pitons.
These “hard” pieces of equipment are designed to provide secure and reliable protection in challenging climbing environments. They are critical for both sport and traditional climbers who seek to ensure safety during climbs. Each piece of equipment plays a unique role in protecting the climber and assisting in navigation. Proper use and understanding of each piece is essential for climbers at all levels.