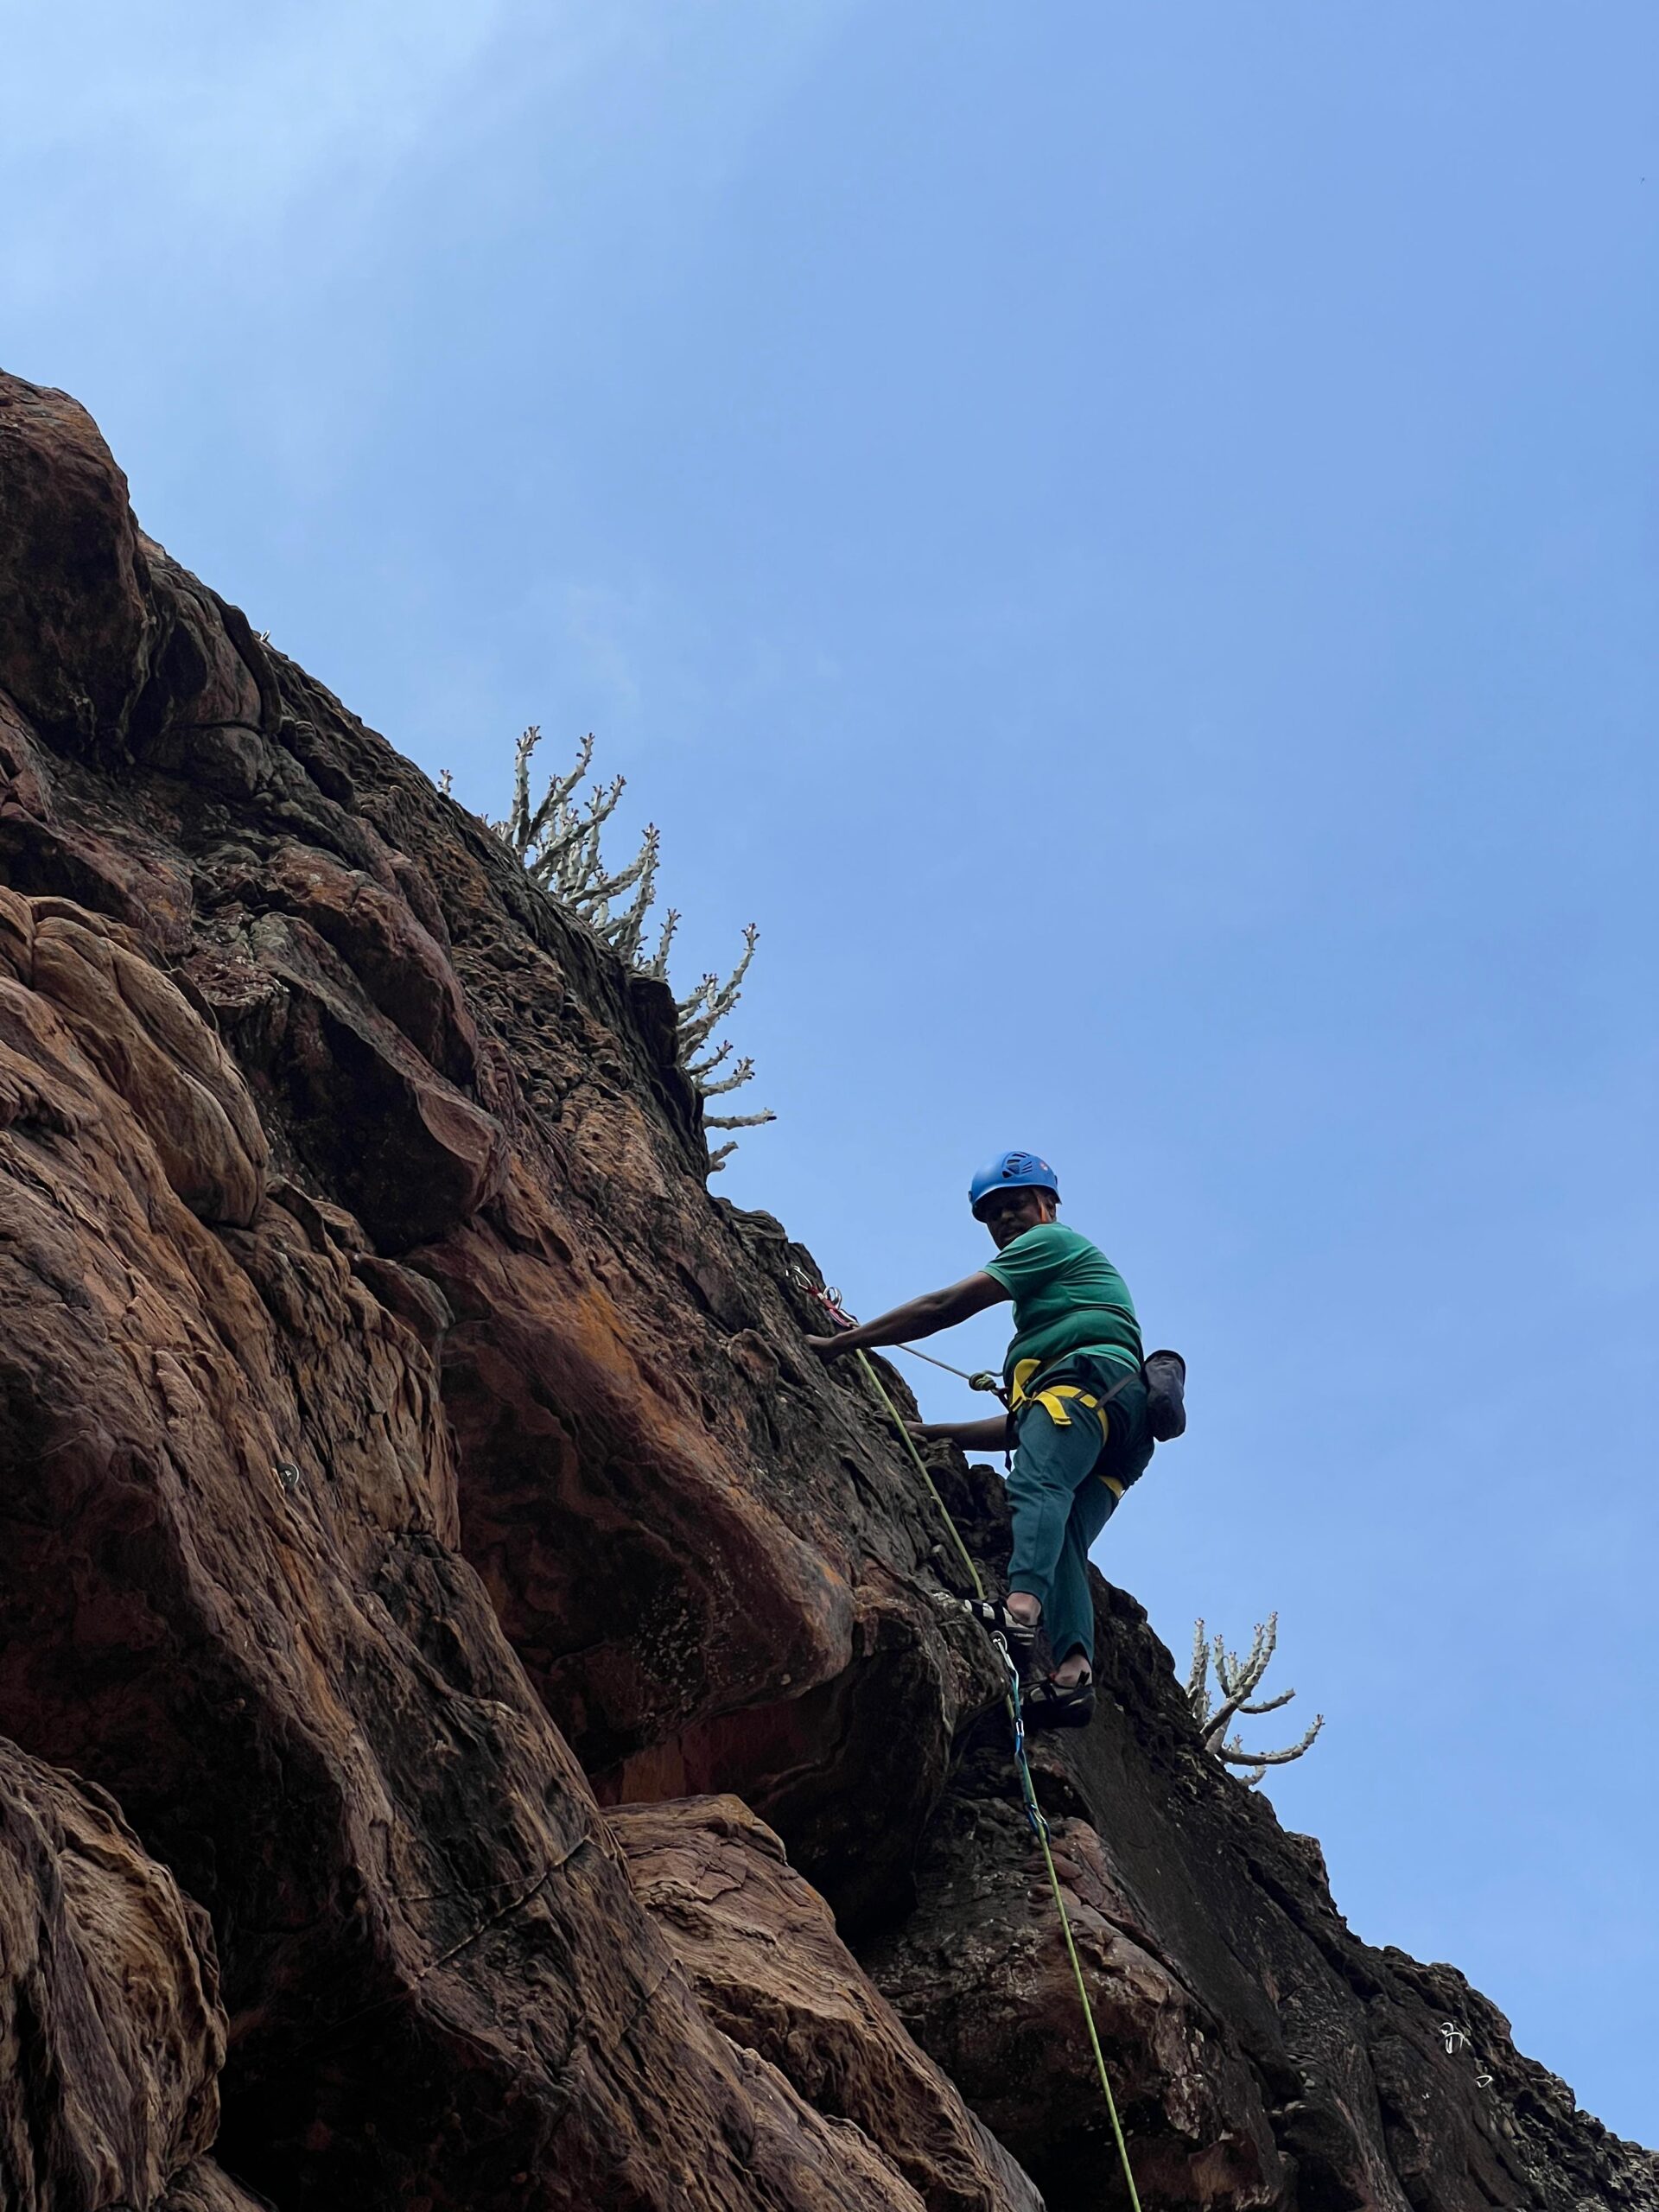
20 Important Rock Climbing Tips for Beginners & how to improve
- Start with Indoor Climbing

- Indoor climbing gyms provide a controlled environment with marked routes to practice techniques safely before heading outdoors.
- Indoor Climbing: A Perfect Blend of Adventure and Fitness
Indoor climbing is an exhilarating activity that combines physical strength, problem-solving, and mental focus in a controlled environment. Whether you are a seasoned climber or a beginner, indoor climbing offers a safe and exciting way to enjoy the thrills of the sport. Here’s everything you need to know about indoor climbing, including its advantages and essential safety tips.
What is Indoor Climbing?
Indoor climbing involves scaling artificial rock walls equipped with handholds and footholds of various shapes and sizes. These walls are designed to mimic natural rock formations, providing climbers with a diverse range of challenges. Popular types of indoor climbing include:
Top-Roping: Climbers are securely harnessed and connected to a rope anchored at the top of the wall.
Bouldering: Performed at lower heights without ropes, but with thick mats for cushioning falls.
Lead Climbing: Involves clipping into fixed anchors as you ascend, suitable for experienced climbers.
Advantages of Indoor Climbing
Year-Round Accessibility
Indoor climbing is not weather-dependent, making it an excellent activity regardless of the season.
Safety
Climbing gyms are equipped with cushioned floors, trained staff, and standardized equipment, ensuring a secure environment for climbers.
Fitness Benefits
Builds strength and endurance.
Improves flexibility and balance.
Enhances problem-solving and mental focus.
Social and Fun
Climbing gyms are great places to meet like-minded people and foster a sense of community.
Skill Development
It’s an ideal setting for beginners to learn climbing techniques before transitioning to outdoor rock climbing.
Safety Tips for Indoor Climbing
Wear Proper Gear
Use climbing shoes for grip and comfort.
Ensure your harness is snug and properly fastened.
Chalk can be helpful to keep hands dry and improve grip.
Inspect Equipment
Always check the ropes, harnesses, and carabiners for any signs of wear or damage.
Warm-Up and Stretch
Prepare your muscles to reduce the risk of strain or injury.
Follow Instructions
Pay attention to the gym staff’s guidance, especially if you’re new to climbing.
Know Your Limits
Start with easier routes and gradually progress to more challenging ones as you build skill and confidence.
Use Spotters and Belay Systems
Always climb with a partner who is trained in belaying or under the supervision of a certified instructor.
Mind Your Surroundings
Be aware of other climbers to avoid collisions and ensure mutual safety.
Indoor climbing is an ideal introduction to the world of climbing, offering a blend of challenge, excitement, and safety. Whether you’re seeking a new fitness routine or simply a fun activity, this sport promises a rewarding experience for all ages and skill levels. - Get Proper Gear
- Invest in quality climbing shoes, a harness, a chalk bag, and a helmet. The right gear enhances performance and safety.
- Get Proper Gear: Why Personal Climbing Gear Matters
Investing in personal climbing gear is crucial for both comfort and safety during your indoor or outdoor climbing sessions. While climbing gyms often provide rental equipment, owning your gear ensures a better fit, hygiene, and familiarity, which can significantly enhance your performance and confidence.
Essential Personal Climbing Gear
Climbing Shoes
Purpose: Provide grip, precision, and support on footholds.
Why Own Them?: Rental shoes may not fit perfectly, leading to discomfort and reduced performance. Personal shoes molded to your feet ensure better control and hygiene.
Harness
Purpose: Secures you to the rope or belay system, distributing weight evenly during a fall.
Why Own It?: A well-fitted harness provides comfort and eliminates the hassle of adjusting rental equipment every time you climb.
Chalk and Chalk Bag
Purpose: Keeps your hands dry to improve grip.
Why Own Them?: Personal chalk reduces the spread of germs and ensures you always have a supply during climbs.
Belay Device
Purpose: Helps control the rope when belaying a partner, ensuring safety.
Why Own It?: Familiarity with your belay device enhances efficiency and reduces the learning curve.
Helmet (for Outdoor Climbing)
Purpose: Protects against falling debris or accidental head impacts.
Why Own It?: Helmets are essential for outdoor climbing, and owning one ensures it meets your size and comfort preferences.
Climbing Rope (for Advanced Climbers)
Purpose: Used for lead climbing or top-rope climbing.
Why Own It?: Regular climbers benefit from owning a rope to ensure its quality, length, and handling meet their needs.
Carabiners
Purpose: Connects your harness to the rope or belay system.
Why Own Them?: Having your own high-quality carabiners ensures reliability and familiarity.
Benefits of Having Personal Climbing Gear
Hygiene
Rental gear is shared among climbers and may not be cleaned thoroughly between uses. Personal gear eliminates the risk of skin infections or odors.
Comfort and Fit
Ill-fitting rental gear can cause discomfort and hinder performance. Personal equipment tailored to your size ensures a more enjoyable experience.
Reliability
Owning high-quality gear gives you confidence in its condition and performance, reducing the risk of failure during climbs.
Cost-Effective in the Long Run
For regular climbers, buying personal gear is more economical than repeatedly renting equipment.
Familiarity
Using the same gear consistently helps you understand its nuances, improving efficiency and technique.
Availability
With personal gear, you’re always ready for a climbing session without relying on gym rentals or availability.
How to Choose Personal Gear
When purchasing climbing gear, prioritize quality and fit. Opt for reputable brands that adhere to safety standards, and seek advice from experienced climbers or staff at specialty outdoor stores. Always inspect your gear regularly for wear and tear, replacing items as needed to maintain safety.
Investing in your climbing gear is an essential step toward becoming a confident and skilled climber, whether you’re scaling indoor walls or venturing into outdoor terrain.

- Learn Basic Knots
- Know essential climbing knots like the figure-eight follow-through and the double fisherman’s knot for secure connections.
- Learn Basic Knots: The Foundation of Climbing Safety
Learning basic knots is an essential skill for climbers, as knots are crucial for securing yourself, your equipment, and your climbing partners. They are the backbone of safety in both indoor and outdoor climbing, ensuring that your gear functions correctly and efficiently.
Why Should You Learn Basic Knots?
Safety and Security
Properly tied knots prevent equipment failures, accidents, or dangerous slips during climbs.
Knots like the Figure Eight Follow-Through ensure your harness stays securely attached to the rope.
Versatility in Climbing Scenarios
Different climbing situations require different knots, such as setting up anchors, belaying, or rappelling.
Mastering knots like the Clove Hitch and Prusik Knot prepares you for diverse challenges.
Emergency Preparedness
In case of equipment malfunctions or unexpected situations, knowing the right knot can make a critical difference.
Independence and Confidence
Understanding how to tie and verify knots fosters self-reliance and trust in your setup.
You’ll feel more confident climbing without depending on others to check or tie your knots.
Compatibility with Outdoor Climbing
For outdoor climbers, knowing knots is non-negotiable. From setting up belay systems to securing tarps, knots are part of the experience.
Essential Knots Every Climber Should Know
Figure Eight Follow-Through Knot
Use: Securing the climber’s harness to the rope.
Why Learn It?: It’s the most reliable and widely used knot for tying in.
Clove Hitch
Use: Attaching the rope to an anchor.
Why Learn It?: Simple, adjustable, and essential for anchor setups.
Prusik Knot
Use: Ascending or descending a rope.
Why Learn It?: A lifesaver for self-rescue situations.
Bowline Knot
Use: Creating a secure loop at the end of a rope.
Why Learn It?: Useful for anchors or temporary tie-offs.
Double Fisherman’s Knot
Use: Joining two ropes together.
Why Learn It?: Ideal for rappelling or creating longer ropes.
Water Knot
Use: Securing webbing or slings.
Why Learn It?: Perfect for building anchors or extending belay systems.
How to Learn and Practice Climbing Knots
Start Small
Begin with a short piece of rope and practice tying knots at home.
Focus on one knot at a time to build muscle memory.
Seek Guidance
Attend workshops or classes at climbing gyms to learn from professionals.
Watch instructional videos for visual demonstrations.
Test Your Knots
After tying, tug on the rope to ensure the knot is secure and correctly tied.

Practice Regularly
Make knot-tying a habit so that it becomes second nature during climbs.
Benefits Beyond Climbing
Mastering basic knots is not only valuable for climbing but also for other outdoor activities like camping, hiking, or sailing. Knowing how to secure tents, set up shelters, or create improvised safety systems adds to your overall preparedness and versatility as an adventurer.
Final Thoughts
Learning basic knots is a fundamental skill that enhances safety, builds confidence, and opens doors to more advanced climbing techniques. With practice and dedication, you’ll gain the knowledge and independence to tackle climbing challenges with ease and security.
Belay device

- Take a belaying class to learn how to manage the rope for your climbing partner and ensure mutual safety.
- Understand Belaying: The Backbone of Climbing Safety
Belaying is a critical climbing skill that ensures the climber’s safety by managing the rope. It involves using a belay device to control the rope, arrest a fall, and provide slack or tension as needed. Mastering belaying is essential for anyone participating in climbing, whether indoor or outdoor.
What is Belaying?
Belaying is the process of securing the climbing rope through a friction device to manage a climber’s ascent or descent. The belayer acts as the climber’s lifeline, preventing long falls and ensuring controlled descents.
Why is Belaying Important?
Safety
Belaying provides the climber with a safety backup, ensuring they are securely tied to the system and protected in case of a fall.
Control
Belayers control the rope to give the climber freedom of movement while maintaining enough tension to arrest a fall instantly.
Trust and Partnership
Climbing is often a team activity, and effective belaying builds trust between climbers, creating a safe and enjoyable experience.
Versatility
Knowing how to belay equips climbers for various situations, from lead climbing to top-roping and rappelling.
The Components of Belaying
Climbing Rope
Connects the climber to the belayer and the anchor system.
Belay Device
A friction tool (e.g., ATC, GriGri) that helps control the rope.
Harness
Worn by both the climber and belayer for secure attachment to the rope.
Carabiner
Connects the belay device to the harness and allows smooth operation of the system.
Anchor (if needed)
Secures the belayer to a fixed point for additional stability during challenging climbs.
Types of Belaying
Top-Rope Belaying
The rope runs from the climber through an anchor at the top and back down to the belayer.
Ideal for beginners as it provides maximum security.
Lead Belaying
The climber clips the rope into quickdraws on the way up, and the belayer manages the rope slack.
Requires advanced skills to manage falls and avoid excessive slack.
Rappelling Belay
Used to control a climber’s descent, typically on longer outdoor climbs.
Steps to Proper Belaying
Set Up the Belay System
Attach the belay device to the harness with a carabiner.
Thread the rope through the device according to the manufacturer’s instructions.
Perform Safety Checks
Verify that the climber’s knot, harness, and carabiner are secure.
Double-check the belay setup and communication signals.
Belay Technique (PBUS Method)
Pull: Pull slack out of the rope.
Brake: Lock the rope in the belay device to arrest movement.
Underhand Slide: Slide the brake hand back up the rope.
Secure: Repeat the process, keeping control of the rope at all times.
Communication
Establish clear commands with the climber, such as: “On belay?” / “Belay on.”
“Climbing?” / “Climb on.”
“Take!” or “Slack!”
Safety Tips for Belaying
Stay Focused
Always pay attention to the climber and avoid distractions.
Maintain a Firm Grip
Never let go of the brake hand, even momentarily.
Manage Rope Slack
Avoid too much slack, which can result in longer falls.
Avoid excessive tension, which can hinder the climber’s movement.
Practice with an Experienced Climber
Gain confidence and refine your technique under supervision.
Use the Right Equipment
Ensure the belay device is appropriate for the rope diameter and type of climbing.
Benefits of Learning Belaying
Empowers Independence
You can safely partner with others and enjoy climbing without depending on professional guides.
Fosters Teamwork
Belaying strengthens the climber-belayer bond, encouraging mutual trust and cooperation.
Essential for Outdoor Climbing
Belaying is a core skill for tackling outdoor climbing routes where safety measures are limited.
Final Thoughts
Understanding and mastering belaying is a cornerstone of safe climbing. It not only safeguards the climber but also enhances the overall climbing experience by fostering trust and teamwork. Practice regularly, focus on safety, and soon you’ll become a confident belayer ready to tackle any climbing adventure!Understand Belaying: The Backbone of Climbing Safety
Belaying is a critical climbing skill that ensures the climber’s safety by managing the rope. It involves using a belay device to control the rope, arrest a fall, and provide slack or tension as needed. Mastering belaying is essential for anyone participating in climbing, whether indoor or outdoor.
What is Belaying?
Belaying is the process of securing the climbing rope through a friction device to manage a climber’s ascent or descent. The belayer acts as the climber’s lifeline, preventing long falls and ensuring controlled descents.
Why is Belaying Important?
Safety
Belaying provides the climber with a safety backup, ensuring they are securely tied to the system and protected in case of a fall.
Control
Belayers control the rope to give the climber freedom of movement while maintaining enough tension to arrest a fall instantly.
Trust and Partnership
Climbing is often a team activity, and effective belaying builds trust between climbers, creating a safe and enjoyable experience.
Versatility
Knowing how to belay equips climbers for various situations, from lead climbing to top-roping and rappelling.
The Components of Belaying
Climbing Rope
Connects the climber to the belayer and the anchor system.
Belay Device
A friction tool (e.g., ATC, GriGri) that helps control the rope.
Harness
Worn by both the climber and belayer for secure attachment to the rope.
Carabiner
Connects the belay device to the harness and allows smooth operation of the system.
Anchor (if needed)
Secures the belayer to a fixed point for additional stability during challenging climbs.
Types of Belaying
Top-Rope Belaying
The rope runs from the climber through an anchor at the top and back down to the belayer.
Ideal for beginners as it provides maximum security.
Lead Belaying
The climber clips the rope into quickdraws on the way up, and the belayer manages the rope slack.
Requires advanced skills to manage falls and avoid excessive slack.
Rappelling Belay
Used to control a climber’s descent, typically on longer outdoor climbs.
Steps to Proper Belaying
Set Up the Belay System
Attach the belay device to the harness with a carabiner.
Thread the rope through the device according to the manufacturer’s instructions.
Perform Safety Checks
Verify that the climber’s knot, harness, and carabiner are secure.
Double-check the belay setup and communication signals.
Belay Technique (PBUS Method)
Pull: Pull slack out of the rope.
Brake: Lock the rope in the belay device to arrest movement.
Underhand Slide: Slide the brake hand back up the rope.
Secure: Repeat the process, keeping control of the rope at all times.
Communication
Establish clear commands with the climber, such as: “On belay?” / “Belay on.”
“Climbing?” / “Climb on.”
“Take!” or “Slack!”
Safety Tips for Belaying
Stay Focused
Always pay attention to the climber and avoid distractions.
Maintain a Firm Grip
Never let go of the brake hand, even momentarily.
Manage Rope Slack
Avoid too much slack, which can result in longer falls.
Avoid excessive tension, which can hinder the climber’s movement.
Practice with an Experienced Climber
Gain confidence and refine your technique under supervision.
Use the Right Equipment
Ensure the belay device is appropriate for the rope diameter and type of climbing.
Benefits of Learning Belaying
Empowers Independence
You can safely partner with others and enjoy climbing without depending on professional guides.
Fosters Teamwork
Belaying strengthens the climber-belayer bond, encouraging mutual trust and cooperation.
Essential for Outdoor Climbing
Belaying is a core skill for tackling outdoor climbing routes where safety measures are limited.
Final Thoughts
Understanding and mastering belaying is a cornerstone of safe climbing. It not only safeguards the climber but also enhances the overall climbing experience by fostering trust and teamwork. Practice regularly, focus on safety, and soon you’ll become a confident belayer ready to tackle any climbing adventure!
Focus on Footwork
- Focus on Footwork
- Use your legs to push rather than relying solely on your arms. Precision foot placement reduces fatigue.
- Focus on Footwork: The Foundation of Successful Climbing
Climbing isn’t just about upper body strength—it’s about precision, balance, and efficiency. Proper footwork plays a vital role in conserving energy and maintaining control on the wall. Whether you’re an indoor climber or scaling outdoor rock faces, mastering footwork is essential for success.
Why Footwork Matters
Energy Efficiency
Good footwork reduces reliance on arm strength, helping you climb longer without fatigue.
Improved Balance
Strategic placement of your feet helps maintain your center of gravity, keeping you stable on the wall.
Precision and Control
Proper foot placement allows smoother transitions between holds, minimizing unnecessary movements.
Injury Prevention
Deliberate, controlled footwork reduces the risk of slipping or putting excessive strain on joints.
Tips for Improving Footwork
1. Place Your Feet with Intention
Avoid smearing your feet aimlessly against the wall. Instead, place them carefully on holds to maximize friction and stability.
2. Use the Edges of Your Shoes
The inside or outside edge of climbing shoes provides better contact with footholds, especially on small edges.
3. Focus on Precision
Aim for small footholds confidently and commit to your step. Adjust if needed, but avoid unnecessary shuffling.
4. Keep Your Hips Close to the Wall
Bringing your hips closer helps your feet carry more weight, reducing strain on your hands and arms.
5. Practice Smearing
On flat or slab surfaces without obvious holds, learn to trust the rubber of your climbing shoes to grip the wall.
6. Engage Your Toes
Push with your toes rather than your entire foot, as it allows for more precise movements and better balance.
Drills to Enhance Footwork
1. Silent Feet Drill
Climb while focusing on making as little noise as possible when placing your feet. This enhances precision and control.
2. Slow-Motion Climbing
Deliberately climb slowly, emphasizing deliberate and accurate foot placement.
3. No-Hands Climbing
Attempt to climb easy routes using only your feet for support, forcing you to rely on balance and footwork.
4. Sticky Foot Drill
Once you place your foot on a hold, commit to it. Avoid readjusting or “shuffling” your feet mid-climb.
Common Footwork Mistakes
Over-Reliance on Arms
Beginners often pull with their arms instead of pushing with their feet, leading to faster fatigue.
Ignoring Small Footholds
Failing to utilize small holds limits options and forces inefficient movements.
Poor Shoe Placement
Flat-footed steps reduce grip and control. Always use the toes or edges for better contact.
Unnecessary Movements
Fidgeting with foot placement wastes energy and breaks rhythm.
Benefits of Strong Footwork
Climbing Efficiency
With proper footwork, you use less energy, making challenging routes feel more manageable.
Smooth Transitions
Seamless foot placement helps you climb fluidly, maintaining momentum and balance.
Confidence on the Wall
Knowing you can rely on your feet builds trust in your abilities, especially on technical routes.
Skill Development
As your footwork improves, you’ll tackle more difficult climbs with greater ease and finesse.
Final Thoughts
Mastering footwork is about patience and practice. By focusing on precise movements, engaging your feet actively, and trusting your climbing shoes, you’ll develop a strong foundation for tackling increasingly challenging routes. Remember, climbing isn’t just about reaching the top—it’s about how efficiently and gracefully you get there. Start honing your footwork today to elevate your climbing game!
Practice Balance and Body Positioning
- Practice Balance and Body Positioning
- Keep your body close to the wall and distribute your weight efficiently to maintain stability.
- Practice Balance and Body Positioning: Key to Efficient Climbing
Balance and body positioning are essential skills for any climber, whether you’re scaling indoor walls or natural rock formations. These elements are the foundation of efficient movement, helping you conserve energy, maintain control, and tackle challenging routes with confidence.
Why Balance and Body Positioning Matter
Energy Conservation
Proper positioning reduces the need for excessive force, allowing you to climb longer and more effectively.
Enhanced Stability
Maintaining your center of gravity ensures you stay steady on the wall, even on tricky holds.
Improved Technique
Mastering body positioning enables smoother transitions and greater precision during climbs.
Reduced Risk of Injury
Proper balance minimizes unnecessary strain on muscles and joints, helping prevent injuries.
Principles of Balance and Body Positioning
1. Keep Your Center of Gravity Aligned
Your body’s center of gravity should be close to the wall, usually centered over your feet. This minimizes strain on your arms.
2. Use Your Hips
Shift your hips to the side or towards the wall to distribute weight evenly and reduce reliance on upper body strength.
3. Maintain Three Points of Contact
Always keep at least two hands and one foot or two feet and one hand on the wall to stay balanced.
4. Face the Wall Strategically
Avoid climbing flat against the wall. Rotate your body slightly to the side to make better use of footholds and conserve energy.
Techniques for Practicing Balance
1. Weight Shifting
Practice shifting your weight from one foot to the other to understand how your balance changes.
2. One-Foot Climbing
Attempt to climb using only one foot for support while the other foot lightly touches the wall. This builds core strength and balance.
3. Dynamic Movements
Incorporate controlled dynamic moves where you deliberately push off one hold to reach the next while maintaining balance.
4. Static Climbing
Focus on slow, deliberate movements to fine-tune your body positioning.
Tips for Optimizing Body Positioning
Push with Your Legs
Use your legs to propel upward, rather than pulling with your arms.
Engage Your Core
A strong core stabilizes your movements and helps maintain balance.
Look Ahead
Plan your next move and position your body accordingly. Avoid getting stuck in awkward stances.
Practice Drop Knees and Flags
Use techniques like drop knees (rotating your knee inward to create leverage) or flagging (extending one leg out for balance) to adjust your body’s positioning.
Avoid Over-Reaching
Keep your movements within a comfortable range to maintain stability and prevent overexertion.
Drills to Improve Balance and Positioning
1. Balance Beam Walking
Walk across a narrow beam to develop stability and focus.
2. Core Strength Exercises
Incorporate planks, yoga, or Pilates into your routine to build the core muscles that support balance.
3. Static Wall Practice
Stay in a fixed position on the wall for as long as possible to practice holding your balance.
4. Wall Traversing
Move sideways along the wall instead of climbing up, focusing on smooth transitions and maintaining balance.
Benefits of Strong Balance and Positioning
Smoother Movements
With balanced positioning, you can flow from one hold to the next effortlessly.
Increased Confidence
Trusting your body’s balance and positioning helps you tackle more challenging climbs.
Better Endurance
Conserving energy through efficient movement lets you climb longer without fatigue.
Adaptability on Various Routes
Mastering balance allows you to handle different climbing surfaces, from slabs to overhangs, with ease.
Final Thoughts
Balance and body positioning are not just skills—they’re the art of climbing. By practicing deliberate movements, engaging your core, and learning how to distribute your weight effectively, you’ll climb with greater efficiency and confidence. Embrace the process, focus on control, and watch your climbing technique improve dramatically!
Learn to Rest on the Wall
- Learn to Rest on the Wall
- Find rest positions to reduce strain, such as straightening your arms or using a ledge to relax your legs.
- Learn to Rest on the Wall: A Vital Skill for Sustained Climbing
Resting on the wall is an essential technique that helps climbers conserve energy and prepare for the next sequence of moves. Whether you’re climbing indoors or outdoors, learning to rest effectively can make a significant difference in your endurance, efficiency, and overall success.
Why Resting on the Wall is Important
Energy Conservation
Resting allows your muscles to recover during a climb, reducing fatigue.
Improved Focus
Taking a break on the wall provides time to assess the route ahead and strategize your next moves.
Enhanced Endurance
Effective resting helps you climb longer and tackle more challenging routes.
Reduced Risk of Overexertion
Avoiding continuous strain prevents muscle fatigue and potential injuries.
Techniques for Resting on the Wall
1. Find a Good Resting Spot
Look for larger holds (known as “jug holds”) where you can comfortably grip or stand.
2. Shake Out Your Hands
Alternate releasing one hand at a time and shake it out to relax the forearm muscles.
3. Engage Your Feet
Shift most of your weight onto your feet to relieve tension in your arms.
4. Straighten Your Arms
Keep your arms straight rather than bent to minimize muscle engagement and conserve energy.
5. Practice Deep Breathing
Take slow, deep breaths to calm your mind and reduce lactic acid buildup in your muscles.
6. Flagging for Balance
Use one leg to “flag” or extend outward for better balance while resting on smaller footholds.
Types of Wall Rests
Standing Rest
Stand fully on a large foothold while keeping your body close to the wall.
Sit Rest
Use a ledge or a secure spot to partially sit, allowing maximum recovery.
Hand Swap Rest
If no foothold is large enough to take full weight, alternate hands to rest each arm.
Wall Lean Rest
Lean into the wall using your body to reduce arm strain.
Training for Effective Resting
Wall Traversing
Practice moving sideways along the wall and pausing on different holds to simulate resting positions.
Core and Leg Strength
Strengthen your legs and core to shift more weight to your lower body while resting.
Grip Endurance
Use grip trainers or hangboards to improve your ability to hold on during rests.
Route Familiarization
Study routes before climbing to identify potential resting spots in advance.
Tips for Resting on Difficult Holds
Use Micro-Rests: Even brief pauses can help if no jug holds are available.
Avoid Over-Gripping: Relax your grip to prevent unnecessary energy loss.
Shift Positions: Alternate between hands and adjust body angles to find relief.
Keep Moving When Necessary: If resting isn’t feasible, slow your pace and use deliberate movements to conserve energy.
Benefits of Mastering Wall Resting
Extended Climbing Sessions
Resting effectively allows you to climb longer and enjoy the experience fully.
Better Problem-Solving
A clear mind and rested body make it easier to solve complex climbing problems.
Increased Confidence
Knowing how to rest gives you a psychological advantage, especially on challenging routes.
Improved Performance
Resting strategically can make the difference between completing a route and having to abandon it mid-climb.
Final Thoughts
Resting on the wall is both an art and a science. By practicing effective techniques, you’ll not only conserve energy but also enhance your overall climbing performance. Remember, climbing is about strategy as much as strength—so take the time to pause, breathe, and prepare for the challenges ahead!
Start with Beginner Routes
- Start with Beginner Routes
- Choose climbs within your skill level to build confidence and technique gradually.
- Start with Beginner Routes: The Perfect Entry into Climbing
For those new to climbing, starting with beginner routes is crucial to build foundational skills, confidence, and a love for the sport. These routes are designed to be less physically demanding and more accessible, allowing climbers to focus on technique, problem-solving, and comfort on the wall.
Why Start with Beginner Routes?
Build Confidence
Climbing beginner routes helps you gain trust in your abilities, gear, and the wall.
Learn Proper Techniques
These routes emphasize fundamental skills like foot placement, grip, and balance.
Avoid Injury
Beginner routes reduce the risk of overexertion or strain as you acclimate to climbing.
Understand Route Reading
You’ll develop the ability to “read” holds and plan movements effectively.
Enhance Problem-Solving
Practice thinking strategically about the best way to navigate the wall.
Features of Beginner Routes
Larger Holds
These are easier to grip, reducing hand fatigue.
Shorter Heights
Routes are typically closer to the ground, which helps alleviate fear.
Gentler Angles
Beginner walls are often vertical or slightly inclined, rather than overhanging.
Clear Markings
Holds are often color-coded or labeled to guide you through the climb.
Predictable Sequences
Movements between holds are intuitive and straightforward.
Tips for Climbing Beginner Routes
1. Take Your Time
Focus on deliberate, controlled movements rather than rushing through the climb.
2. Prioritize Foot Placement
Pay attention to where you place your feet; good footing is key to conserving energy.
3. Use Your Legs
Push yourself upward with your legs instead of pulling with your arms.
4. Grip Loosely
Avoid over-gripping holds; keep a relaxed but secure grip.
5. Rest When Needed
Pause at secure positions to relax and assess your next moves.
6. Ask for Guidance
Don’t hesitate to seek advice from instructors or experienced climbers.
What to Expect on Your First Climb
Understanding the Route
Observe the path before starting; identify which holds you’ll use for hands and feet.
Physical Sensations
Expect some strain on your fingers, arms, and legs, but beginner routes are manageable.
Trial and Error
It’s normal to slip or need multiple attempts to complete a route.
Feeling of Achievement
Reaching the top is incredibly rewarding, no matter how long it takes.
How to Progress from Beginner Routes
Experiment with Intermediate Routes
Gradually increase difficulty by attempting routes with smaller holds or steeper angles.
Improve Technique
Focus on skills like balance, body positioning, and advanced footwork.
Increase Endurance
Climb longer routes or practice traversing to build stamina.
Challenge Yourself Mentally
Attempt routes that require more problem-solving and strategy.
Final Thoughts
Beginner routes are the perfect introduction to the world of climbing. They provide a safe, fun, and educational environment to master the basics and prepare for more challenging climbs. Remember, climbing is about progress, not perfection—enjoy the journey, and celebrate every ascent!
warm Up and Stretch
- Warm Up and Stretch
- Prepare your body with light exercises and stretching to prevent injury and enhance flexibility.
- Warm Up and Stretch: The Key to Safe and Effective Climbing
Before embarking on any climbing route, warming up and stretching are essential steps to prepare your body for the physical demands of the activity. A proper warm-up increases blood flow to your muscles, enhances flexibility, and reduces the risk of injury, while stretching improves your range of motion and climbing efficiency.
Why Warm Up Before Climbing?
Increases Blood Flow
Prepares your muscles and joints for movement by raising their temperature.
Reduces Risk of Injury
Loosens tight muscles and enhances joint flexibility to prevent strains or sprains.
Boosts Performance
A warm body responds better to the physical challenges of climbing.
Improves Mental Focus
Establishes a connection between your mind and body, helping you strategize better on the wall.
Effective Warm-Up Exercises for Climbers
1. Light Cardio
Perform 5–10 minutes of activities like jogging, jumping jacks, or cycling to increase heart rate and circulation.
2. Dynamic Movements
Incorporate movements that mimic climbing actions, such as arm circles, leg swings, or hip rotations.
3. Finger and Hand Activation
Use a stress ball, grip trainer, or perform finger curls to prepare your hands and fingers for gripping holds.
4. Shoulder and Arm Mobility
Do shoulder rolls, push-ups, or scapular shrugs to engage the upper body.
5. Core Engagement
Warm up your core with planks or mountain climbers, as a strong core is vital for climbing stability.
Why Stretching is Important for Climbers
Enhances Flexibility
Stretching improves your ability to reach holds and execute complex moves.
Reduces Muscle Tension
Loosens tight areas, making movements smoother and more controlled.
Improves Recovery
Post-climbing stretches reduce muscle soreness and promote recovery.
Stretching Exercises for Climbing
1. Forearm and Wrist Stretches
Forearm Stretch: Extend one arm forward, palm facing up, and gently pull your fingers back with the opposite hand.
Wrist Circles: Rotate your wrists in both directions to increase mobility.
2. Shoulder Stretches
Cross-Body Stretch: Pull one arm across your chest and hold it with the other hand.
Overhead Stretch: Extend your arms overhead and clasp your hands together for a full upper-body stretch.
3. Leg and Hip Stretches
Lunge Stretch: Step one foot forward into a lunge position to open your hips.
Hamstring Stretch: Sit on the ground with one leg extended and reach for your toes.
4. Back and Core Stretches
Cat-Cow Stretch: Alternate between arching and rounding your back on all fours.
Torso Twists: Sit or stand and twist your upper body side to side.
5. Calf and Ankle Stretches
Calf Stretch: Place your toes on a step and lower your heel.
Ankle Rotations: Roll your ankles in both directions to prepare for stable footing.
Tips for Effective Warm-Up and Stretching
Start Slowly
Gradually increase intensity to avoid straining cold muscles.
Focus on Problem Areas
Pay extra attention to commonly used muscles, such as forearms, shoulders, and legs.
Breathe Deeply
Maintain steady breathing during stretches to help relax muscles.
Avoid Static Stretching Before Climbing
Save longer static stretches for post-climbing recovery; dynamic movements are better for warming up.
Listen to Your Body
Avoid pushing into pain; stretches should feel gentle and relieving.
Warm-Up and Stretching Routine (10–15 Minutes)
Cardio Warm-Up: 5 minutes of light jogging or jumping jacks.
Dynamic Movements: 2–3 minutes of arm circles, leg swings, and wrist rotations.
Forearm and Finger Activation: 2 minutes of finger curls or grip exercises.
Shoulder and Arm Stretching: 1–2 minutes of cross-body and overhead stretches.
Leg and Hip Stretching: 3 minutes of lunges, hamstring stretches, and calf stretches.
Final Thoughts
Taking the time to warm up and stretch is a small investment that pays off in safer, more effective climbs. By preparing your body and mind, you’ll climb with greater ease, reduce fatigue, and minimize the risk of injury. Prioritize these practices, and you’ll be scaling walls like a pro in no time!
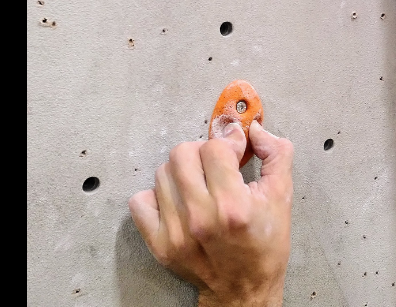
Build Grip Strength
- Build Grip Strength
- Use grip trainers or practice on fingerboards to strengthen your hands and fingers.
Building Grip Strength: Details, Advantages, and Safety Tips
Details on Building Grip Strength
Grip strength refers to the force generated by the muscles in your hands and forearms. Developing grip strength is essential for various activities, including sports, weightlifting, daily tasks, and preventing injuries. Exercises targeting grip strength focus on flexor and extensor muscles in the hands, wrists, and forearms.
Exercises to Build Grip Strength
Hand Grippers: Squeezing and releasing grippers of different resistance levels.
Dead Hangs: Hanging from a pull-up bar to improve endurance and grip.
Farmer’s Carries: Walking while holding heavy weights in both hands.
Wrist Curls and Reverse Wrist Curls: Using dumbbells to strengthen forearm muscles.
Pinch Grip Training: Holding weight plates together between fingers.
Towel Grip Pull-ups: Wrapping a towel around a bar and gripping it during pull-ups.
Advantages of Building Grip Strength
Enhanced Performance: A strong grip improves performance in sports like rock climbing, gymnastics, and tennis.
Improved Lifting Ability: Essential for weightlifting, deadlifts, and pull-ups.
Injury Prevention: Reduces the risk of hand, wrist, and elbow injuries by strengthening supporting muscles and tendons.
Functional Strength: Makes daily tasks like opening jars, carrying groceries, or manual labor easier.
Better Bone Health: Enhances wrist and forearm bone density, reducing the risk of osteoporosis.
Indicator of Overall Health: Studies show a correlation between grip strength and cardiovascular health or longevity.
Safety Tips for Grip Strength Training
Warm-Up Properly: Begin with dynamic stretches or light exercises to avoid injury.
Progress Gradually: Increase intensity, resistance, or duration over time to prevent overuse injuries.
Focus on Form: Use proper technique to avoid strain or incorrect muscle engagement.
Rest and Recovery: Allow time for recovery to prevent overtraining and muscle fatigue.
Avoid Overloading: Do not exceed your physical limits, as it can lead to tendon or joint injuries.
Listen to Your Body: Stop training if you feel pain or discomfort during exercises.
Use Protective Gear: Gloves or wrist supports can provide additional safety, especially for beginners.
Building grip strength is a valuable investment in physical health and performance. By integrating safe and effective exercises into your routine, you can enjoy the benefits of enhanced strength and reduced injury risk.
- Focus on Technique Over Strength
- Prioritize efficient movement and proper form instead of brute force.
- Focus on Technique Over Strength in Grip Training
When building grip strength, prioritizing proper technique over sheer strength is essential. This approach ensures optimal results, reduces the risk of injury, and promotes long-term improvement.
Why Technique Matters
Prevents Injury: Correct technique minimizes strain on tendons, joints, and muscles, protecting against overuse injuries.
Improves Efficiency: Proper form targets the intended muscles effectively, ensuring better gains without wasted effort.
Builds a Strong Foundation: Mastering technique lays the groundwork for safely increasing resistance or intensity.
Encourages Balanced Development: Focused form prevents dominant muscles from compensating, ensuring balanced strength across muscles and tendons.
Key Principles for Proper Grip Technique
Hand Positioning:
Ensure even distribution of pressure across your palm and fingers.
Avoid hyperextending or bending wrists awkwardly during exercises.
Engage Supporting Muscles:
Use your forearms, wrists, and fingers collectively rather than relying on a single area.
Avoid letting larger muscles, like biceps, take over in grip-related movements.
Controlled Movements:
Perform exercises slowly and deliberately.
Avoid jerking or rushing through reps, which can lead to improper form.
Progressive Overload:
Gradually increase resistance or duration while maintaining correct technique.
Sacrificing form for heavier loads diminishes gains and increases injury risk.
Consistency Over Maximal Effort:
Frequent practice with moderate effort is more effective than infrequent maximal attempts.
Build endurance alongside strength.
Use the Right Tools:
Incorporate grip-specific equipment like grippers, bars, or resistance bands designed for safety and ergonomics.
Example: Dead Hangs with Proper Technique
Grip the Bar: Wrap your fingers and thumb securely around the bar; avoid “false grip” unless advanced.
Maintain Alignment: Keep wrists neutral, avoiding excessive bending.
Engage Shoulders: Slightly retract shoulder blades to protect joints and activate stabilizers.
Controlled Duration: Focus on holding for time without swinging or losing posture.
Benefits of Prioritizing Technique
Sustainable Progress: Avoiding plateaus or setbacks caused by improper form.
Injury-Free Training: Long-term grip strength improvements without strain or chronic pain.
Confidence in Movements: Proper technique instills confidence for advanced exercises and real-world tasks.
Better Skill Transfer: Technique mastery translates to improved performance in sports, weightlifting, and daily activities.
By focusing on technique first, you create a solid and safe foundation for building grip strength, ensuring effective training and long-term success.
Learn How to Fall
- Learn How to Fall
- Practice falling in a controlled setting to reduce fear and understand how to land safely.
- Learn How to Fall: A Guide to Falling Safely
Knowing how to fall safely is an invaluable skill for reducing the risk of injury during accidents, sports, or even everyday activities. The right techniques can minimize impact, protect vital areas, and enhance your confidence in potentially hazardous situations.
Why Learning to Fall Matters
Prevents Serious Injuries: Reduces the risk of fractures, concussions, or sprains.
Increases Confidence: Encourages participation in sports or activities where falling is a possibility.
Promotes Awareness: Trains the body to react instinctively in unexpected situations.
Improves Recovery Time: Safe falls often result in less severe injuries, speeding up recovery.
Key Principles of Safe Falling
Stay Calm:
Panic often leads to rigid movements, increasing the likelihood of injury.
Relax your body to better absorb the impact.
Avoid Stiff Arms:
Never try to break a fall by locking your arms straight.
Instead, aim to distribute the impact over a larger area.
Tuck Your Chin:
Keep your head tucked to prevent it from hitting the ground.
This reduces the risk of head or neck injuries.
Distribute Impact:
Spread the force of the fall across larger areas, such as your back, side, or shoulders.
Avoid concentrated impact on your hands, wrists, or hips.
Roll With It:
When possible, use a rolling motion to dissipate the energy of the fall.
Practice “forward rolls” and “side rolls” for a smooth transition during falls.
Techniques for Different Scenarios
1. Forward Fall (Trip or Slip)
What to Do:Protect your face by turning your head to the side.
Bend your elbows and allow your forearms to take some of the impact.
Let your knees and thighs absorb force as you fall.
2. Backward Fall
What to Do:Tuck your chin to your chest to protect your head.
Avoid reaching back with your arms; instead, cross them over your chest.
Allow your upper back and buttocks to absorb the impact.
3. Side Fall
What to Do:Keep your arms bent and close to your chest.
Roll slightly onto your shoulder and side to spread the impact.
Practice Drills to Learn Falling Safely
Mat Practice:
Use padded mats to rehearse falling techniques in a controlled environment.
Breakfall Drills (Used in Martial Arts):
Practice “slapping the mat” with your arms to dissipate energy when falling backward or sideways.
Balance Training:
Work on maintaining balance to prevent falls in the first place (e.g., yoga, balance boards).
Controlled Rolls:
Practice rolling forward, backward, and sideways to improve reflexive movements.
Additional Safety Tips
Wear Protective Gear: In activities like biking or skating, always wear helmets, knee pads, and wrist guards.
Strengthen Core and Joints: A strong core and flexible joints help you recover or reduce impact during a fall.
Be Aware of Your Surroundings: Stay mindful of slippery floors, uneven surfaces, or clutter.
The Benefits of Learning to Fall
Reduced Fear of Falling: Especially important for older adults or athletes.
Improved Reflexes: Enhances the body’s natural ability to react in emergencies.
Better Physical Health: Leads to fewer injuries and long-term mobility.
Learning how to fall safely is a skill that can protect you in countless situations. With practice and mindfulness, you can make falling less of a risk and more of a manageable experience.
Climb with an Experienced Partner
- Climb with an Experienced Partner
- A seasoned climber can teach you techniques, guide you on safety, and provide valuable advice.
- Why Climb with an Experienced Partner?
Safety First:
Experienced climbers are skilled at identifying hazards, using gear correctly, and managing risks.
They can teach you proper belaying techniques, knots, and safety checks.
Learn Faster:
An experienced partner can provide real-time advice, feedback, and tips to improve your technique.
You’ll learn from their knowledge of routes, climbing strategies, and problem-solving.
Boost Confidence:
Having a trustworthy partner reduces anxiety, allowing you to focus on climbing.
Their support can encourage you to try challenging routes you might avoid alone.
Access to Advanced Skills:
They can demonstrate advanced techniques such as crack climbing, overhangs, or multi-pitch routes.
You’ll get hands-on experience with route reading, anchor building, or rappel setups.
Better Problem Solving:
Experienced climbers often have a deeper understanding of how to tackle challenging holds or sequences.
They can suggest creative solutions and help you refine your approach.
How to Maximize the Experience
Be Open to Learning:
Listen attentively to advice and ask questions.
Be willing to try new techniques or approaches even if they feel unfamiliar.
Communicate Clearly:
Discuss expectations, goals, and any concerns before you start climbing.
Use clear commands and signals during climbs (e.g., “On belay?”, “Climbing”).
Observe and Mimic:
Watch your partner closely to learn how they approach problems, manage gear, or handle tricky moves.
Try to replicate their techniques to develop your skills.
Practice Safety Together:
Double-check each other’s gear and knots before climbing.
Ensure you’re familiar with their safety preferences and routines.
Respect Their Time and Energy:
Show appreciation for their guidance and avoid being overly reliant.
Contribute to the partnership by taking turns leading or managing equipment.
Ask for Feedback:
Request constructive criticism on your climbing, belaying, or gear management.
Use their insights to work on specific areas of improvement.
Qualities of a Good Experienced Partner
Patient and Supportive: They should be willing to explain concepts and provide encouragement.
Knowledgeable and Safety-Oriented: They should prioritize safety and demonstrate sound climbing practices.
Communicative: Clear and open communication helps build trust and efficiency.
Skilled in Diverse Terrain: A versatile climber can expose you to a wide range of climbing styles and challenges.
Benefits of Climbing with an Experienced Partner
Improved Technique: Gain insights into body positioning, efficient movement, and grip strength.
Enhanced Safety Awareness: Learn to recognize potential risks and adopt best practices.
Increased Motivation: Having a skilled partner inspires you to push your limits.
Access to Better Routes: They can guide you to suitable and exciting climbing locations.
Final Thoughts
Climbing with an experienced partner is a rewarding way to develop your skills and build confidence. Approach the experience with a learning mindset, communicate effectively, and be proactive in contributing to the partnership. Over time, their guidance will help you become a safer, stronger, and more proficient climber.
Plan Your Route
- Plan Your Route
- Visualize your path up the wall before climbing to anticipate challenges and plan movements.
- Plan Your Route: A Key to Successful and Safe Climbing
Route planning is an essential part of climbing, whether you’re heading to an indoor gym or tackling an outdoor crag. It helps you manage challenges, maximize efficiency, and stay safe during your climb. Here’s a guide to planning your climbing route effectively.
Why Route Planning is Important
Increases Efficiency: Identifying key holds and sequences saves energy and time.
Enhances Safety: Planning helps you anticipate potential hazards like loose rocks or difficult sections.
Improves Success Rates: Strategizing before you climb reduces mistakes and boosts confidence.
Builds Confidence: Knowing what to expect can calm nerves and help you focus.
Strengthens Technique: Studying the route allows you to refine your movements and body positioning.
Steps to Plan Your Route
1. Assess the Environment
Indoor Climbing: Study the color-coded holds or markings for your chosen route.
Outdoor Climbing: Examine the rock face, noting cracks, ledges, and other features.
Weather and Conditions: For outdoor climbs, check for wet, icy, or crumbly surfaces.
2. Identify Key Features
Look for starting holds, rest points, cruxes (the most challenging part), and the finishing hold.
Visualize how you’ll move between holds and what techniques might be required, such as smearing, jamming, or mantling.
3. Consider Your Abilities
Match the route to your skill level and experience.
Take into account your reach, flexibility, and strength for specific moves.
4. Plan Your Gear
Indoor: Ensure you have the right shoes, chalk, and belay device.
Outdoor: Plan for protection, quickdraws, ropes, and other climbing gear.
Double-check that your gear matches the route’s requirements (e.g., rope length for the route height).
5. Practice Visualization
Mentally climb the route before you start.
Imagine your hand and foot placements, body positioning, and transitions between moves.
6. Warm Up and Practice Moves
If possible, try easier routes with similar moves to the planned route.
For outdoor routes, try bouldering sections at the base to get a feel for the rock texture and holds.
7. Evaluate Risks and Backup Plans
Identify potential fall zones and make sure your protection is set up accordingly.
Have a plan for retreating or descending if you cannot complete the climb.
Tips for Effective Route Planning
Start Simple: Focus on one or two moves ahead instead of overanalyzing the entire route.
Use Rest Points: Look for areas where you can pause and recover.
Minimize Over-Gripping: Plan to use only as much grip strength as necessary to conserve energy.
Communicate with Your Partner: Share your plan and signals to ensure seamless coordination.
Adapt When Necessary: Be flexible and ready to adjust if holds don’t feel as expected or conditions change.
Common Challenges and How to Overcome Them
Unclear Holds: Feel for hidden holds if you can’t spot the next one.
Overthinking: Avoid analysis paralysis by focusing on steady progress.
Unexpected Crux: Use rest points to reassess and strategize if the crux is tougher than expected.
Benefits of Route Planning
Improved Performance: Strategizing helps you climb more smoothly and confidently.
Better Energy Management: Efficient planning reduces wasted movements and fatigue.
Enhanced Safety: A thoughtful plan lowers the likelihood of accidents or missteps.
Route planning is a skill that improves with practice. By preparing thoughtfully and staying adaptable during your climb, you’ll enhance your performance and safety while enjoying the process.
Stay Hydrated
- Stay Hydrated
- Keep water on hand to avoid dehydration, especially during long climbing sessions.
- Stay Hydrated: Essential Tips for Climbers
Proper hydration is critical for climbers to maintain energy, focus, and safety during climbs, whether indoors or outdoors. Dehydration can lead to fatigue, muscle cramps, poor decision-making, and even serious health risks. Here’s why hydration matters and how to stay properly hydrated while climbing.
Why Hydration is Important for Climbers
Boosts Physical Performance: Adequate hydration supports muscle function, endurance, and recovery.
Enhances Focus: Dehydration can impair concentration and decision-making, critical for safe climbing.
Regulates Body Temperature: Essential during outdoor climbs in hot or humid conditions.
Prevents Muscle Cramps: Proper hydration keeps muscles functioning smoothly, reducing the risk of cramping.
Speeds Recovery: Staying hydrated aids in repairing and replenishing muscles post-climb.
Hydration Tips for Climbers
1. Hydrate Before You Climb
Pre-Climb Hydration: Drink 16–20 oz (500–600 ml) of water 2–3 hours before climbing.
Electrolyte Balance: Include an electrolyte drink if you’ve sweated heavily during prior activities.
2. Bring Water to the Climb
Portable Options: Use a lightweight water bottle or hydration pack for accessibility.
Recommended Intake: Aim for 7–10 oz (200–300 ml) every 20–30 minutes during activity.
3. Monitor Signs of Dehydration
Symptoms include dry mouth, fatigue, dizziness, dark urine, or muscle cramps.
If you notice these signs, pause, rehydrate, and rest.
4. Rehydrate Post-Climb
Replace Fluids Lost: Drink 16–24 oz (500–700 ml) of water or a rehydration drink within 2 hours of finishing.
Replenish Electrolytes: Snack on salty foods or drink an electrolyte solution to restore sodium, potassium, and magnesium.
Hydration Strategies for Outdoor Climbs
Plan Ahead
Check for water availability at your climbing site.
Bring enough water for the entire climb, factoring in temperature and duration.
Use a Hydration Pack
Ideal for multi-pitch or long climbs, allowing hands-free access to water.
Stay Cool
Climb during cooler parts of the day when possible, and seek shade to minimize sweating.
Choose the Right Drinks
Water is sufficient for most climbs.
For intense or prolonged climbs, include sports drinks for electrolyte replenishment.
Avoid Common Hydration Mistakes
Skipping Water Breaks: Forgetting to drink can lead to dehydration before you notice it.
Overhydrating: Drinking excessive amounts of plain water without electrolytes can dilute sodium levels (hyponatremia).
Relying on Thirst: By the time you feel thirsty, you’re already mildly dehydrated.
Ignoring Post-Climb Needs: Failing to rehydrate after climbing slows recovery and muscle repair.
Benefits of Staying Hydrated
Sustained Energy: Keeps you energized and reduces fatigue during long climbs.
Improved Safety: Clear thinking and strong physical performance reduce the risk of accidents.
Better Endurance: Hydrated muscles recover faster, allowing you to climb longer and stronger.
Enhanced Enjoyment: Feeling good physically and mentally lets you fully enjoy the climbing experience.
By prioritizing hydration before, during, and after your climbs, you’ll protect your health, improve your performance, and set yourself up for success on every ascent.
Be Mindful of Your Limits
- Be Mindful of Your Limits
- Listen to your body and stop if you’re too tired or feel pain to avoid injuries.
- Be Mindful of Your Limits: A Climber’s Guide to Safe and Effective Progress
Climbing pushes both physical and mental boundaries, but knowing and respecting your limits is crucial for safety, progress, and long-term enjoyment. Pushing too hard or ignoring your limitations can lead to injury, burnout, or dangerous situations. Here’s how to climb mindfully while continuing to improve.
Why Knowing Your Limits is Important
Reduces Injury Risk: Overextending can lead to sprains, strains, or serious accidents.
Enhances Safety: Helps you make sound decisions during climbs, especially in challenging or unfamiliar conditions.
Encourages Sustainable Growth: Gradual improvement builds strength and confidence over time without setbacks.
Maintains Mental Focus: Avoiding overwhelming challenges prevents panic and poor decision-making.
How to Be Mindful of Your Limits
1. Assess Your Physical Condition
Warm-Up and Stretch: Ensure your muscles are ready for exertion to prevent injuries.
Listen to Your Body: Pay attention to fatigue, pain, or stiffness during a climb.
Know Your Strengths and Weaknesses: Be aware of areas needing improvement, such as grip strength, endurance, or flexibility.
2. Recognize Mental Barriers
Manage Fear: Respect natural fear but distinguish it from panic. If fear overwhelms you, pause and reassess.
Stay Focused: Avoid distractions and stay mentally engaged with the climb.
Set Realistic Goals: Tackle routes that challenge but don’t overwhelm your current skills.
3. Learn to Say “No”
Avoid Peer Pressure: Don’t attempt routes or techniques that feel unsafe or beyond your capabilities.
Back Out If Necessary: It’s okay to retreat from a climb if conditions or your energy levels aren’t right.
4. Gradually Push Your Limits
Incremental Progress: Slowly increase the difficulty of routes or intensity of your training.
Track Improvements: Keep a record of what you’ve accomplished and where you’ve struggled to set reasonable next steps.
Practice Problem-Solving: Spend time refining techniques on challenging holds or sections before attempting full routes.
5. Have a Safety Plan
Climb with a Partner: An experienced partner can help assess risks and provide support.
Check Your Gear: Ensure all equipment is in good condition and appropriate for the climb.
Know Your Exit Strategies: Plan for controlled descents or safe retreats if needed.
When to Stop or Rest
Physical Signs: Muscle shaking, severe fatigue, or pain signals it’s time to pause or stop.
Mental Signs: Difficulty focusing, fear that feels paralyzing, or overanalyzing moves may indicate a need for rest.
Environmental Signs: Changing weather, loose rocks, or failing light are good reasons to call it a day.
Tips for Healthy Progression
Start Small: Focus on easier climbs to build foundational skills and confidence.
Practice Rest Days: Give your body time to recover and strengthen between climbs.
Seek Guidance: Learn from experienced climbers or instructors who can help you safely push your boundaries.
Stay Honest with Yourself: Regularly reassess your skills, strengths, and areas needing improvement.
The Benefits of Mindful Climbing
Injury Prevention: Staying within safe limits keeps you climbing consistently over the long term.
Improved Confidence: Respecting your limits builds a strong mental framework for handling challenges.
Sustainable Progress: Gradual improvement ensures steady growth in strength, technique, and resilience.
Greater Enjoyment: Climbing with awareness allows you to focus on the experience rather than worrying about potential risks.
Being mindful of your limits isn’t about holding back—it’s about climbing smart. By balancing challenge with safety, you’ll enjoy climbing more, improve faster, and stay injury-free, ensuring a long and fulfilling journey in the sport.
Learn Climbing Etiquette
- Learn Climbing Etiquette
- Respect others at the gym or crag by waiting your turn, keeping noise to a minimum, and cleaning up chalk marks.
- Learn Climbing Etiquette: Respect, Safety, and Community
Climbing is not just a sport; it’s a shared experience that thrives on mutual respect and understanding. Practicing proper climbing etiquette ensures safety, minimizes conflicts, and fosters a welcoming environment for everyone, whether you’re at an indoor gym or scaling outdoor crags.
Why Climbing Etiquette Matters
Enhances Safety: Prevents accidents by maintaining order and clear communication.
Respects the Community: Encourages a positive atmosphere where climbers support one another.
Protects the Environment: Minimizes the ecological impact of outdoor climbing.
Fosters Learning: Promotes knowledge sharing and mutual growth among climbers.
Essential Climbing Etiquette Tips
1. Respect the Climbing Space
Indoor Gyms:
Share the walls and don’t monopolize routes.
Step away from the wall when not climbing to avoid blocking others.
Keep bags, shoes, and gear organized and out of walkways.
Outdoor Climbing:
Stay on designated trails to reduce environmental impact.
Avoid loud music or behavior that disturbs others or wildlife.
Leave no trace: Pack out all trash, including tape and chalk wrappers.
2. Communicate Clearly
Always ask, “On belay?” or confirm with “Climbing!” before starting.
Let others know if you need space for a lead climb or if you’re working on a route.
Use standard climbing signals and commands to avoid misunderstandings.
3. Wait Your Turn
Indoor: Don’t rush or crowd someone who’s already on a route.
Outdoor: If a group is using a route, politely ask how long they’ll be or wait for your turn.
4. Be Aware of Your Chalk Use
Use chalk responsibly—don’t leave excessive marks on indoor holds or outdoor rocks.
Clean holds or rock surfaces after climbing, especially outdoors.
5. Respect Other Climbers’ Projects
Avoid touching or climbing on routes someone else is actively working on.
If someone is “resting” on a project, ask politely if you can climb through.
6. Keep Noise Levels Appropriate
Avoid shouting or loud conversations, which can distract climbers or disturb wildlife.
Offer encouragement in a supportive, non-intrusive way.
7. Spot and Belay Responsibly
Pay full attention when spotting or belaying; don’t multitask or get distracted.
Use proper belay and spotting techniques to ensure the climber’s safety.
8. Offer Help Only When Asked
Avoid unsolicited advice unless the climber is in immediate danger.
Be supportive without being overbearing—let climbers learn at their own pace.
9. Use Gear Properly
At indoor gyms, follow all posted rules regarding gear and route types (e.g., no lead climbing on top-rope routes).
Outdoors, only use established bolts or anchors to minimize environmental impact.
10. Follow Leave No Trace Principles
Outdoor climbers should clean up chalk, tape, and trash after finishing.
Avoid damaging plants, wildlife, or rock surfaces.
Etiquette in Specific Situations
Indoor Gyms
Avoid Cross-Climbing: Don’t climb routes that intersect with someone else’s.
Respect Rules: Follow gym-specific guidelines, such as designated bouldering zones or gear requirements.
Outdoor Crags
Yield to Lead Climbers: If someone is leading a climb, give them the right of way.
Protect the Rock: Avoid using permanent fixtures for anything other than climbing purposes.
Climbing Etiquette for Beginners
Ask Questions: Most climbers are happy to share knowledge if you’re unsure about etiquette or techniques.
Observe and Learn: Watch experienced climbers to understand unwritten rules.
Be Gracious: Thank partners, belayers, and anyone who helps or encourages you.
Benefits of Practicing Climbing Etiquette
Builds Positive Relationships: Etiquette fosters camaraderie and trust within the climbing community.
Ensures Fairness: Everyone gets equal opportunity to enjoy climbing spaces.
Preserves Climbing Areas: Responsible behavior protects the environment and keeps climbing areas open to the public.
Enhances the Experience: Mutual respect and good vibes create a more enjoyable atmosphere.
By practicing proper climbing etiquette, you contribute to a safe, respectful, and vibrant climbing community. Whether you’re scaling indoor walls or outdoor cliffs, etiquette ensures everyone can climb with confidence and joy.
Practice Falling Gracefully
- Practice Falling Gracefully
- If using a bouldering wall, practice controlled falls to avoid injuries. Always land on your feet with bent knees.
- Practice Falling Gracefully: Building Confidence and Safety
Falling is an inevitable part of climbing, especially as you push your limits. Learning how to fall safely and gracefully can reduce the risk of injury, improve your mental game, and help you climb with more confidence. Here’s how to practice and master the art of falling effectively.
Why Falling Practice Is Important
Reduces Fear: Familiarity with falling helps minimize anxiety and hesitation during climbs.
Prevents Injury: Proper falling techniques reduce the impact on your body and the chance of injury.
Improves Focus: Eliminates the fear of falling as a distraction, allowing you to focus on technique and problem-solving.
Enhances Partner Trust: Builds trust in your belayer or spotter, creating a safer climbing experience.
How to Practice Falling Gracefully
1. Understand the Dynamics of Falling
Indoor vs. Outdoor: Falling on indoor walls is generally more predictable due to controlled environments, while outdoor falls may involve uneven surfaces or loose rocks.
Types of Falls: Recognize different scenarios, such as top-rope falls, lead falls, and bouldering falls, and prepare accordingly.
2. Start Small
Begin practicing falls from a low height where the risk is minimal.
Gradually increase the height as your confidence and technique improve.
3. Trust Your Belay System
For Top-Roping: Ensure your belayer knows proper technique and maintains a tight rope.
For Lead Climbing: Double-check your belayer’s readiness to catch dynamic falls.
For Bouldering: Use thick crash pads and have a skilled spotter to guide your fall.
4. Control Your Body During a Fall
Stay Relaxed: Tension increases the risk of injury. Loosen your muscles as you fall.
Face the Wall: Keep your body oriented toward the climbing wall to avoid hitting holds awkwardly.
Tuck Your Knees Slightly: Avoid fully extending or locking your knees to prevent jarring impacts.
Avoid Grabbing the Rope: This can lead to rope burns or loss of control.
5. Practice Falling on Different Terrain
Try falling on overhanging walls, vertical walls, and slab climbs to get used to various angles and surfaces.
6. Learn Bouldering Fall Techniques
Aim to land on your feet with slightly bent knees, then roll onto your back to dissipate impact energy.
Avoid trying to “stick” the landing; instead, let the crash pad do its job.
7. Simulate Falls with Your Belayer
Communicate with your belayer before practicing.
Practice dynamic falls to get used to the stretch of the rope and the movement of the belay system.
Common Mistakes to Avoid When Falling
Clinging to Holds: Let go completely instead of trying to grab holds, which can cause hand or finger injuries.
Turning Away from the Wall: Always face the wall to control your fall and reduce the risk of scraping or hitting holds.
Landing Flat-Footed: Avoid locking your knees or landing with stiff legs during bouldering falls.
Poor Communication: Ensure your belayer or spotter knows when you’re practicing falls.
Building Confidence with Falling Practice
Start in a Controlled Setting: Use an indoor climbing gym with experienced staff or a trusted partner.
Repeat Often: Regular practice normalizes falling and helps build muscle memory for proper technique.
Stay Positive: Falling is a natural part of climbing growth, not a failure.
Benefits of Falling Gracefully
Injury Prevention: Proper technique minimizes strain and impact on your body.
Increased Confidence: Reducing fear of falling helps you attempt harder routes without hesitation.
Improved Performance: Freedom from fear allows you to focus on technique and climb more effectively.
Safer Climbing: A well-executed fall protects not just you but also your climbing partner.
Practicing how to fall gracefully is an essential skill for every climber. By embracing falling as a learning opportunity, you’ll climb more confidently, safely, and enjoyably—turning what might feel like a setback into a step forward in your climbing journey.
Use Chalk Sparingly
- Use Chalk Sparingly
- Overusing chalk can hinder grip. Apply it only as needed to keep hands dry.
- Use Chalk Sparingly: Maximizing Grip While Minimizing Impact
Chalk is a valuable tool for climbers, helping to keep hands dry and improve grip. However, overusing it can create unnecessary waste, hinder performance, and even harm climbing environments. Learning how to use chalk efficiently ensures you get the most out of your climbs while respecting others and the natural world.
Why Using Chalk Sparingly Matters
Improves Performance: Over-chalking can reduce friction by clogging pores in the rock or holds, leading to less grip.
Preserves Climbing Spaces: Excess chalk on outdoor routes can stain rocks, disrupt ecosystems, and detract from the natural beauty.
Saves Resources: Chalk isn’t cheap—using it wisely helps reduce waste and expense.
Respects Other Climbers: Minimizing chalk use keeps holds cleaner for everyone.
Tips for Using Chalk Sparingly
1. Start with Clean Hands
Wash your hands before climbing to remove oils and dirt, which can cause more sweating.
Dry your hands thoroughly to reduce the need for excessive chalk application.
2. Use the Right Amount of Chalk
Apply a light layer to coat your hands evenly.
Avoid creating thick, caked-on layers, which can hinder grip rather than enhance it.
3. Brush Holds Regularly
Use a climbing brush to remove excess chalk and dirt from holds, restoring their natural texture.
Brush holds after you’re done climbing, especially in outdoor settings, to leave the route clean for the next climber.
4. Choose Quality Chalk
High-quality chalk often lasts longer and provides better grip, reducing the need for frequent reapplication.
Experiment with liquid chalk for a base layer—it’s longer-lasting and less messy.
5. Chalk Up Strategically
Avoid compulsive chalking during climbs; focus on reapplying only when your hands genuinely need it.
Plan resting spots where you can chalk up efficiently rather than stopping mid-move unnecessarily.
6. Respect Outdoor Etiquette
Minimize chalk use on outdoor routes, especially on lighter-colored rock or in sensitive environments.
Use colored chalk that matches the rock to reduce visible markings on natural surfaces.
Common Mistakes to Avoid
Over-Chalking Before Climbing: Loading up on chalk before starting often leads to wasted chalk and less effective grip.
Chalking as a Crutch: Many climbers overuse chalk out of nervous habit rather than necessity.
Leaving Chalk Stains: Failing to clean holds or rocks can detract from the experience of future climbers and harm the environment.
Ignoring Environmental Impact: Using excessive chalk in natural areas can disrupt ecosystems and harm plants or animals.
How to Chalk Responsibly Outdoors
Use Minimal Chalk: Be mindful of how much you apply and avoid overuse.
Pack It In, Pack It Out: Take your chalk bag, wrappers, and other waste with you when leaving a climbing area.
Clean Up After Yourself: Use a brush to remove chalk marks and restore the rock’s natural appearance.
Benefits of Using Chalk Sparingly
Better Grip: A light, even layer of chalk ensures optimal friction.
Cleaner Holds: Keeps routes pleasant and usable for everyone.
Reduced Waste: Saves money and resources by using only what you need.
Environmental Respect: Protects natural climbing areas for future generations.
By using chalk sparingly, you’ll not only enhance your climbing performance but also contribute to a cleaner, more sustainable climbing culture. Respecting the environment and your fellow climbers ensures a better experience for everyone on the wall.
Enjoy the Process
- Enjoy the Process
- Focus on the fun and growth that comes with climbing rather than fixating on perfection. Progress takes time!
- Enjoy the Process: Embrace the Journey of Climbing
Climbing is more than just reaching the top; it’s about enjoying the experience, the challenges, and the personal growth that comes with it. Whether you’re a beginner or an experienced climber, focusing on the process rather than just the destination will help you grow as a climber and make the sport even more fulfilling.
Why Enjoying the Process Matters
Reduces Pressure: Focusing on the process takes the weight off achieving perfection or immediate success.
Increases Resilience: Embracing challenges as part of the learning process helps you bounce back from setbacks.
Fosters a Positive Mindset: Enjoying each climb, no matter how difficult, cultivates a sense of satisfaction and accomplishment.
Builds Long-Term Enjoyment: The more you enjoy climbing for the journey itself, the more sustainable and fulfilling the sport becomes.
How to Enjoy the Process of Climbing
1. Celebrate Small Wins
Acknowledge Progress: Whether it’s a successful move, a personal best, or improved technique, take time to appreciate your progress.
Set Process-Oriented Goals: Instead of only focusing on completing a route, set goals like improving your footwork, maintaining better body positioning, or enhancing mental focus.
2. Stay Present
Focus on the Moment: Enjoy the feeling of your hands on the rock or the rhythm of your breathing. Let go of distractions, such as the outcome of your climb.
Embrace the Challenge: When things get tough, remind yourself that struggle is part of the process and it’s where growth happens.
3. Appreciate the Learning Curve
Embrace Mistakes: Each mistake is an opportunity to learn and grow. Understand that failure is a natural part of improvement.
Take Your Time: Don’t rush through routes. Focus on refining your technique and developing new skills with patience.
4. Connect with the Climbing Community
Learn from Others: Climbing is a social sport, so enjoy the camaraderie of partners, friends, and mentors. Share tips and celebrate each other’s progress.
Seek Feedback: Constructive advice from others can help you refine your technique and grow.
5. Enjoy the Outdoors
Nature’s Beauty: When climbing outdoors, take time to appreciate the natural beauty around you. The experience is about more than just the climb—it’s about the environment, the weather, and the adventure.
Unplug from Technology: Disconnect from devices to fully immerse yourself in the moment and the climbing experience.
6. Develop a Growth Mindset
Challenge Yourself: Embrace more difficult climbs as a way to learn and develop, not just to conquer.
Stay Curious: Always approach climbing with the mindset of a beginner, eager to learn, explore, and grow.
Common Pitfalls to Avoid
Fixating on Outcomes: Constantly focusing on grades, achievements, or reaching the top can take away from the enjoyment of climbing.
Comparing Yourself to Others: Everyone progresses at their own pace, and comparing your journey to others can create unnecessary pressure.
Rushing Progress: Trying to climb harder routes before you’re ready can lead to frustration and burnout.
Benefits of Enjoying the Process
Reduced Stress and Anxiety: Focusing on the present rather than worrying about the end result reduces performance pressure.
Increased Motivation: When the process itself is rewarding, it fuels your desire to climb more and keep improving.
Stronger Mental Resilience: Embracing setbacks as part of the journey helps build mental strength and determination.
Long-Term Satisfaction: Enjoying the climb for its own sake ensures a lifetime of enjoyment in the sport.
Climbing is a process, not a race. By focusing on the journey—whether you’re making small improvements, overcoming challenges, or just enjoying the rhythm of the climb—you create a fulfilling and sustainable relationship with the sport. The more you enjoy the process, the more you’ll get out of climbing in the long run.
Would you like any of these tips expanded further?